|
||||||||||||||||||||||||||||||||||||||||||
|
|
|
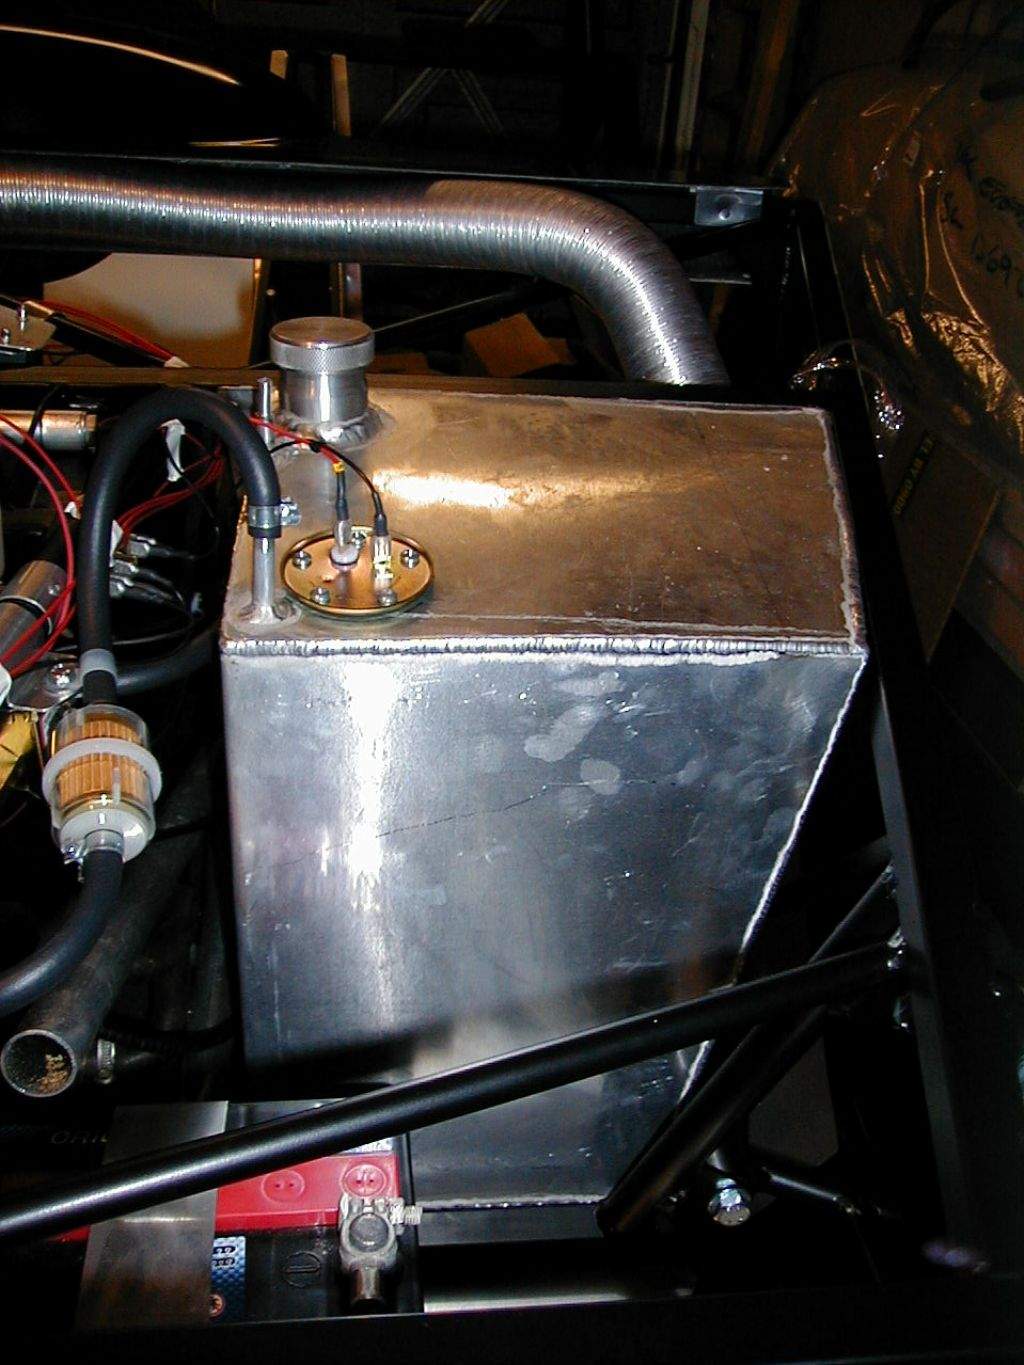
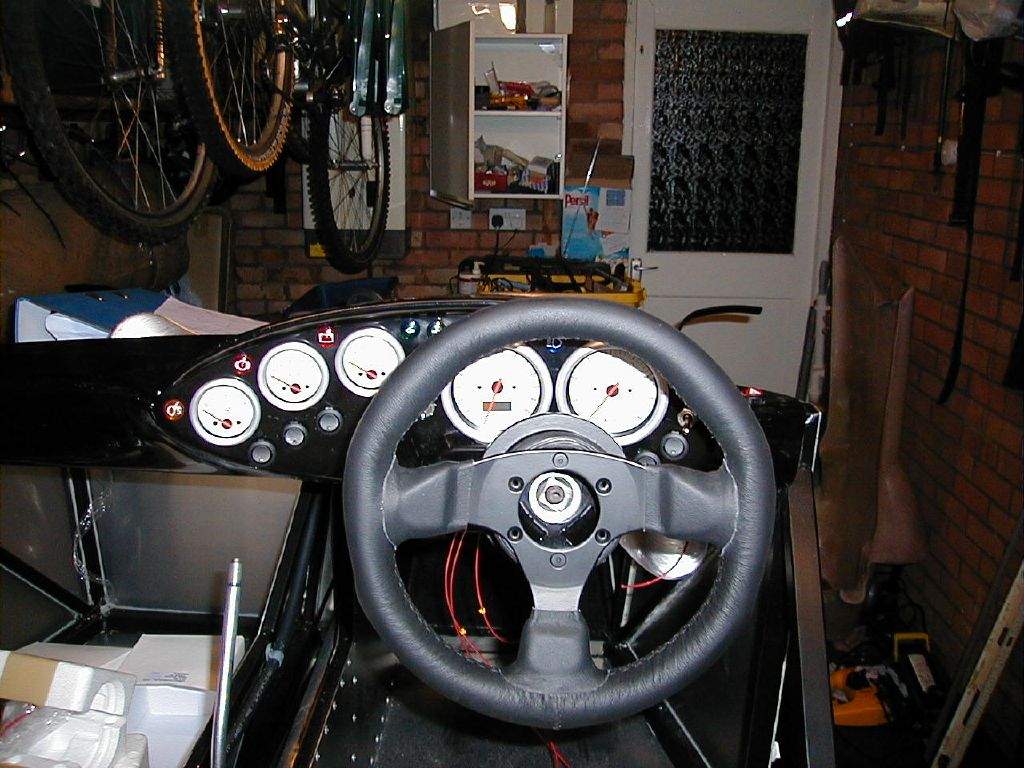
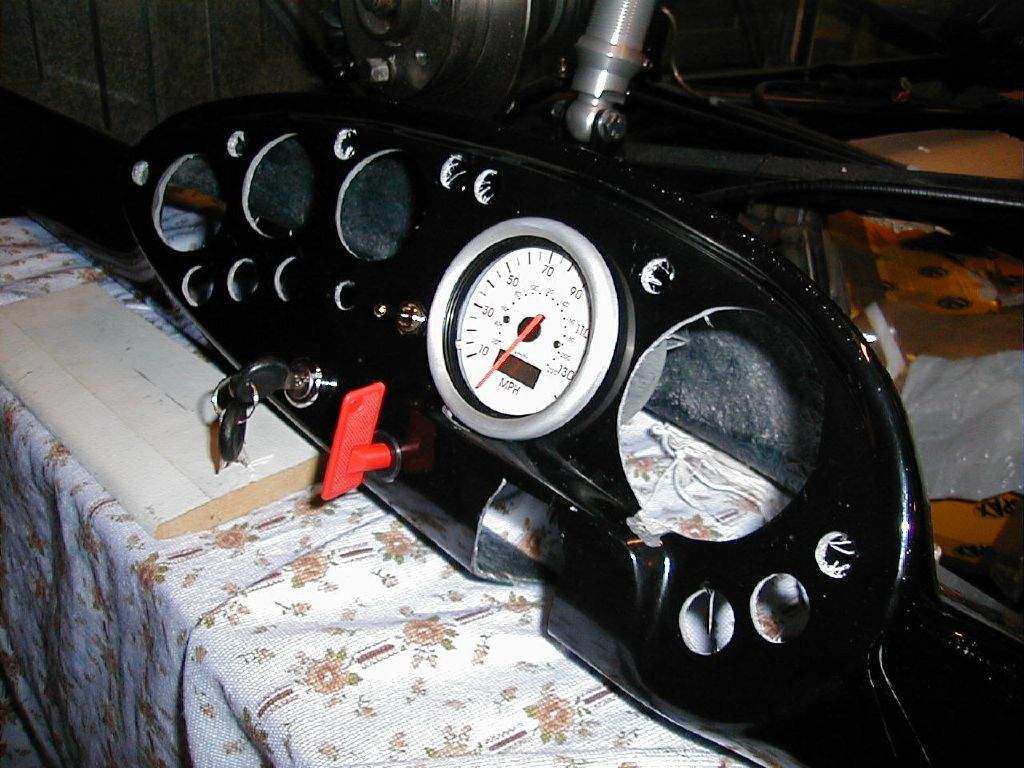
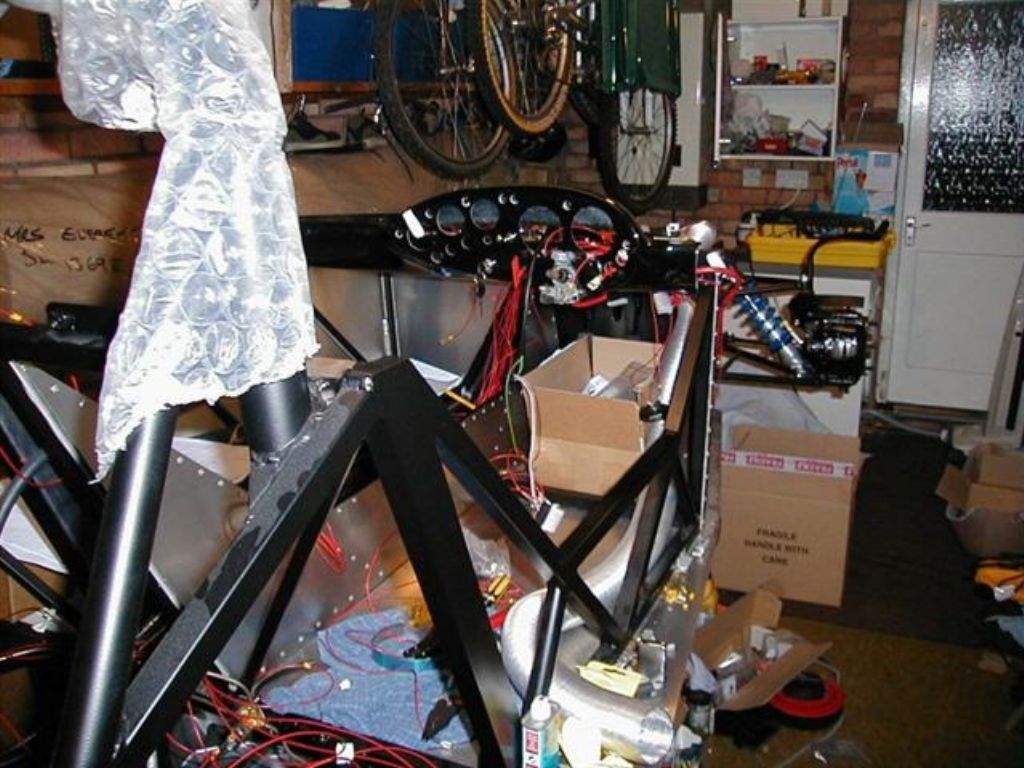
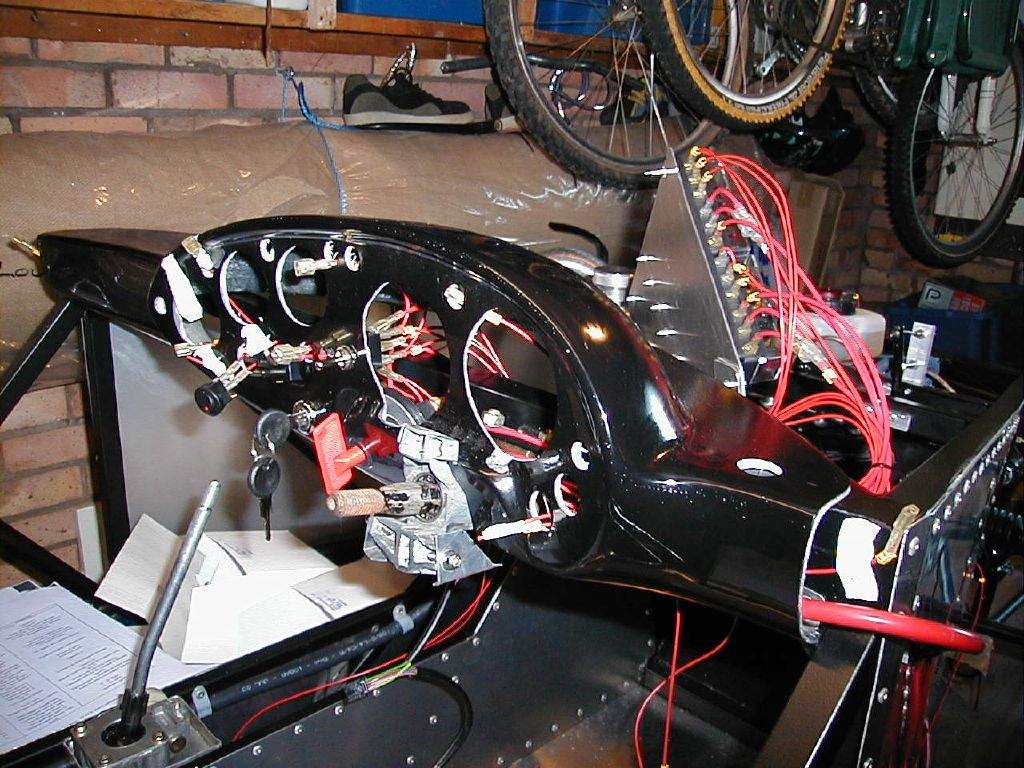
5th January: 1h30m: Decided it was time to get the fuel level sender fitted, so I can then secure the fuel tank and wire up the sender. The sender needed both the swingarm and the mounting rod to be shortened. I realised that the sloping top surface of the tank would throw out the calibration of the sender if I used the standard greengauges recommendations for the length of the two parts, so I used good old common sense combined with a little trial and error, and a multimeter check on the output range of the sender, to decide how much to shorten. I then chain drilled the top of the tank to begin opening up the 43mm hole required for the sender. 6th January: 1h15m: Very impressed with Laser Tools- replacement mandrel arrived in the post today. Let's hope I don't have to phone them again too soon… Finished cutting out the hole in the fuel tank, finished off the edge with my newly acquired dremel-type multi tool. Checked the sender fitted in place, then marked out, drilled and tapped the 5 holes for the securing bolts, then trial fitted the sender in place. The tank will need a good clean out to get rid of all the swarf! 7th January: 3h30m: Started marking out the dashboard for cutting out in order to mount the instruments and switchgear. I removed all of the cardboard templates, and then covered the dash pod with masking tape to enable me to draw directly on the dash. Chain drilled the apertures for the speedo and tacho, then used the multi-tool again to smooth the holes. Also mounted the right hand toggle switch and 2 rocker switches below. 8th January: 1h30m: Marked out the rest of the dash and had a last minute change of plan for the layout of the warning lights! Hope it works out OK... 9th January: 4h00m: Cut out the rest of the holes in the dash. Fibreglass dust is now everywhere...!
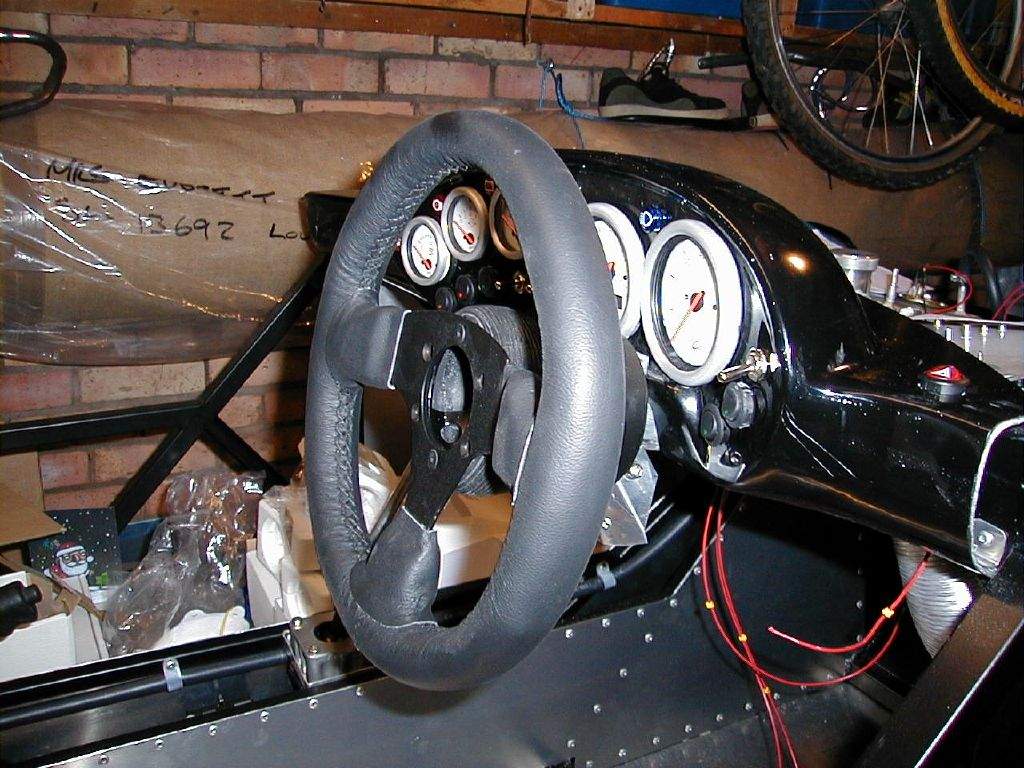
Re-shaped the steering column surround to clear the lower edge of the speedo and tacho.
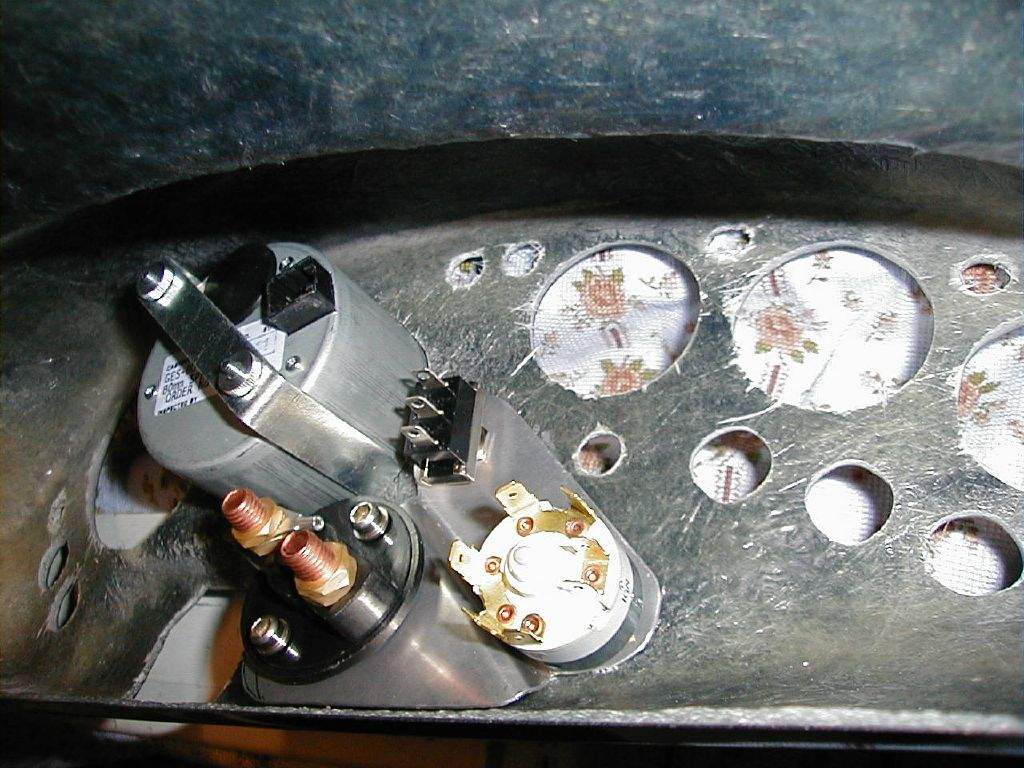
10th January: 3h30m: Had a think about how to mount the battery isolator- I want to mount it flush with the front face of the dashboard. Came up with a cunning solution. I made a bracket that is secured in place at the rear of the dash by both the ignition switch and the nearest toggle switch. This meant a lot of fiddling to get the right shape and size, but I'm really pleased with the end result:
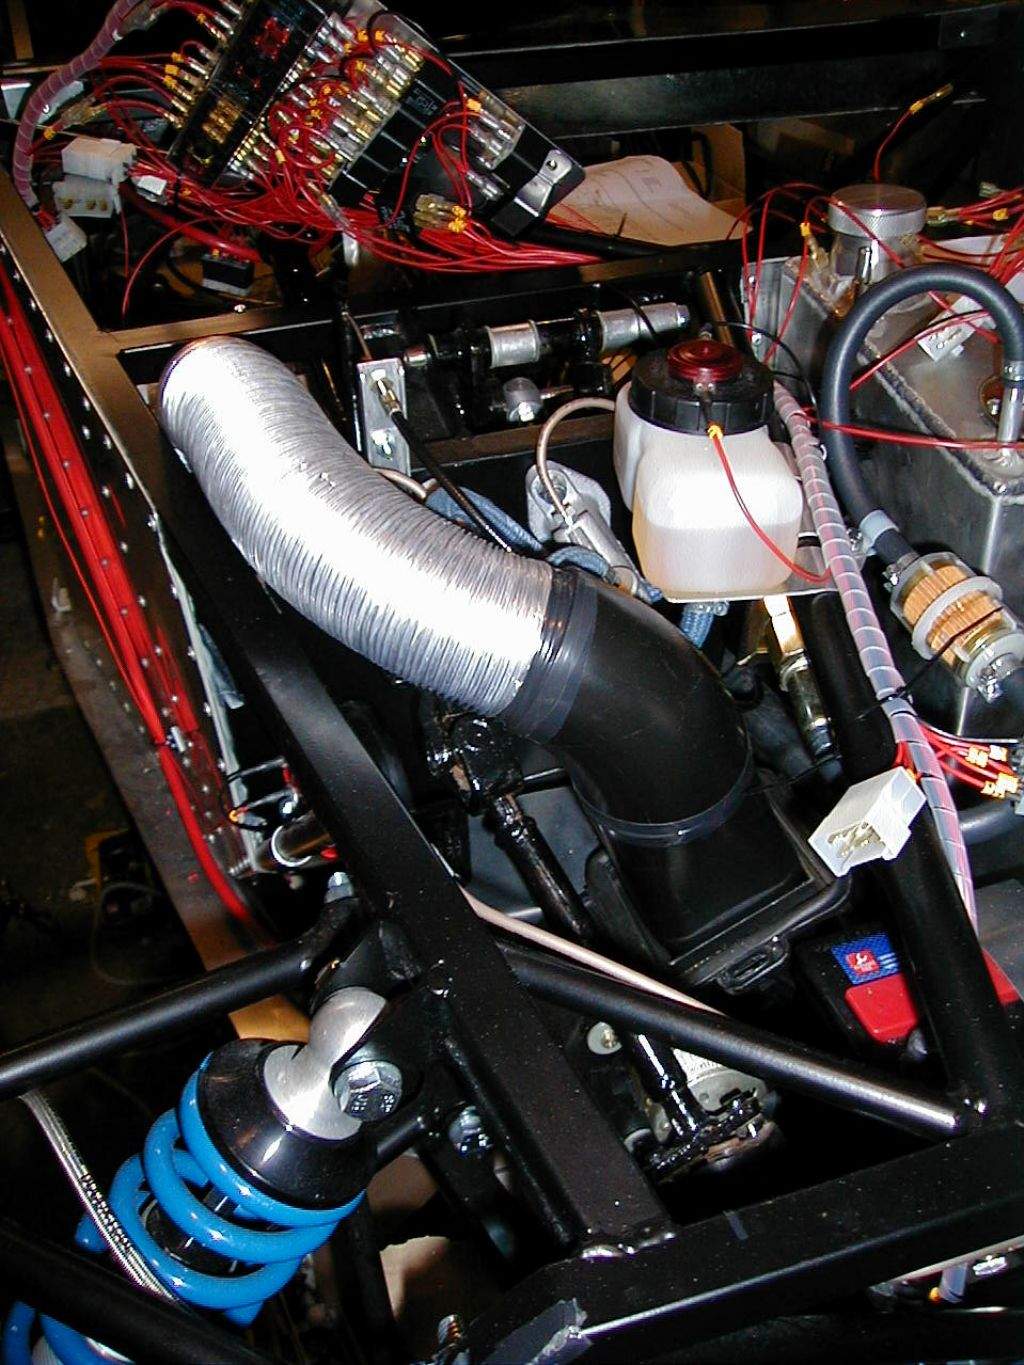
Remembered that I hadn't drilled the hole for the odometer reset button (which, rather strangely, is remote from the speedo), so mounted this between the two left hand toggle switches. 11th Jan – 18th Jan: 10h00m: I'm not going to break these days down, as they all consisted of wiring in some form or other! A test on one occasion revealed I now have a working horn and heater blower (these are about the only 2 items I can check at the moment), so I must be doing something right. Whilst on the subject of wiring, I should explain a little more about how I'm going about it: I'm using 2 colours of cable, predominantly red, with black being used for earth runs back to the chassis. The majority of the wiring is using 16.7A rated thinwall cable from Vehicle Wiring Products, with any high load runs using 33A cable. I also bought a pack of slide on cable markers from VWP, so I'm numbering each end of each run of cable (with the exception of short runs, e.g. between a fuse and relay)- the only way to keep control of the wiring given I'm not using different colour cables. I'm not wiring in any particular order, I'm just marking cables off the wiring diagram as and when I fit them. I've bought a couple of multi-plug connectors for making connections to the front lights- this will make it easier to remove the bonnet should I need to access the radiator or any other stuff in the front end. 19th Jan: 1h30m: Fancied a break from the wiring, so had a look at connecting the heater blower to the aluminium duct. Until recently I was struggling for ideas on how to do this without it looking a complete bodge job! However, I've been keeping my eye open for a suitably-shaped bit of plastic, and had found a section of the air intake duct from a Volvo. With a bit of a cut and shut job to re-orientate one of the bends, I was in business. I thought for a while about how to reconnect the 2 halves of the plastic back together, and the solution, whilst approaching bodge-dom, seems to actually look very neat- black electrical tape is always handy… I also used this to connect the duct hose to the plastic. Whilst the perfectionist in me doesn't like the idea of using tape, it actually looks pretty good. Amazingly, the plastic duct (from the Volvo) fitted straight into the heater blower (from the Fiat 126) with a snug 'interference fit'- how jammy is that?
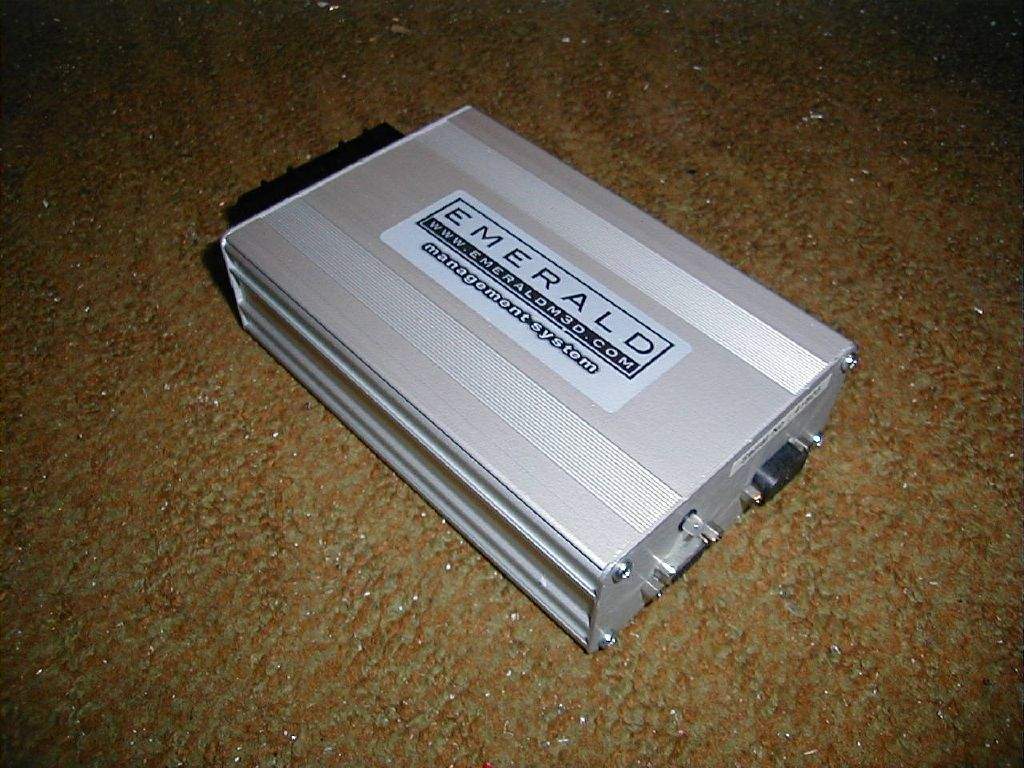
20th Jan: 1h00m: A bit more wiring! 21st Jan: Ordered my ignition ECU! Having originally been thinking Weber Alpha, I then moved towards Omex, and I've finally ended up ordering an Emerald system! This will easily upgrade (via software changes) to throttle bodies in the future, has data logging functionality, can control the radiator fan and fuel pump via relays, and generally seems to be a well respected system, all for a similar price to the other 2 systems I had been considering. I also had a chat with Dave Walker, who runs Emerald, and he seemed to know his stuff! The ECU will come with a base map for the Zetec, and I've gone for the optional water temperature sensor to enable the ECU to control the fan. I can then change the temp. at which the fan cuts in and out via software, rather than faffing around changing the switch, and also I've got the facility to tweak the ignition timing whilst the engine is coming up to temp.- the more things to tweak the better! J 24th Jan: Emerald ECU arrived.
28th Jan: Snow! 2hrs to get home from work (usually 20mins) and no work done on the Mojo! 29th Jan: 1h30m: Package arrived from Vehicle Wiring Products. Continue with wiring…
30th Jan: 2h30m: Start to fit the multiplug connectors into the dash wiring to allow easy final fitting (and future removal too!) 31st Jan: 4h00m: Finished fitting the multiplug connectors to the dash wiring. After some final checks, I decided the wiring was more or less complete (with the exception of ECU to engine, which will be loomed separately), so I started to spiral bind the loom, starting from the fusebox area. This was hard work to start with, with lots of cables heading this way and that, but once I got to the section running through the tunnel it became easier. To do this section, I pulled all of the cables I had laid through the tunnel back out, so they were hanging out of the tunnel across the drivers footwell and out of the side of the chassis. This made life much easier and it was fairly easy to shove this back down the tunnel on completion. Total time spent during January: 35h45m
|
||||||||||||||||||||||||||||||||||||||||
|
|
||||||||||||||||||||||||||||||||||||||||||