|
||||||||||||||||||||||||||||||||||||||||||||||
|
|
|
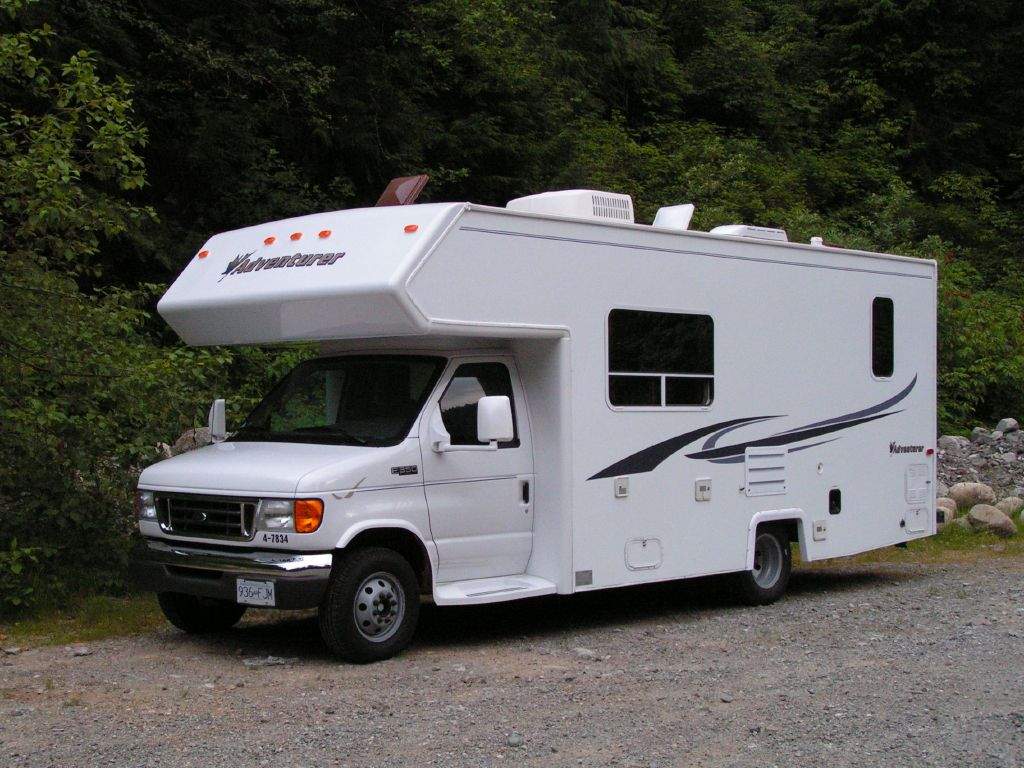
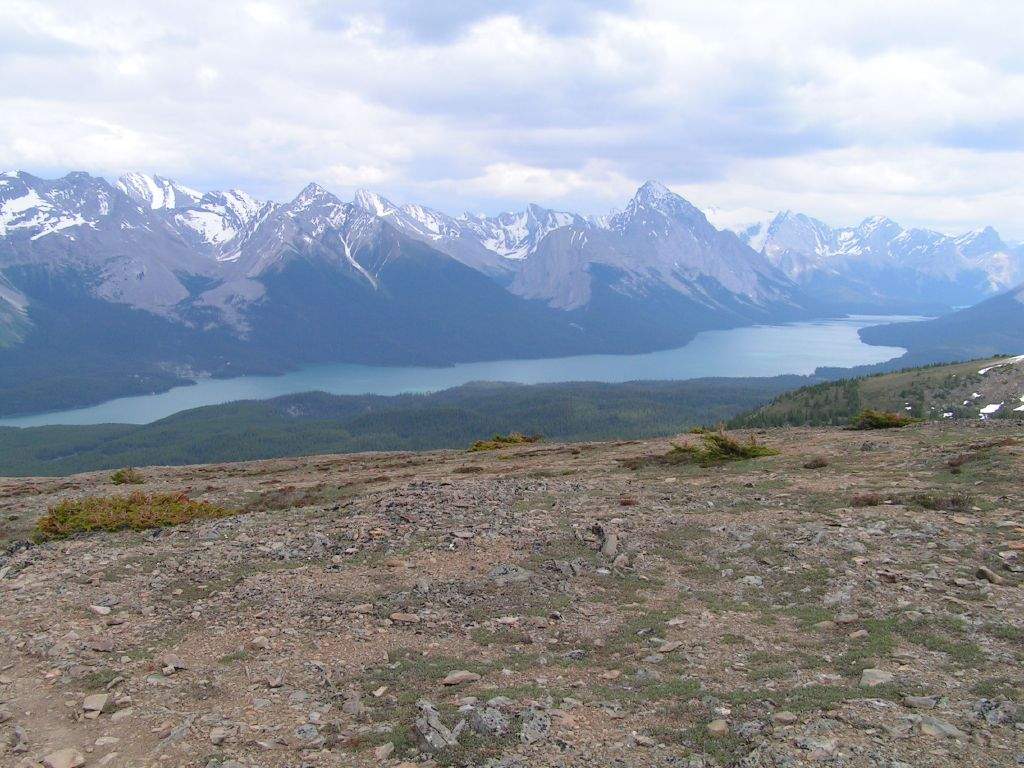
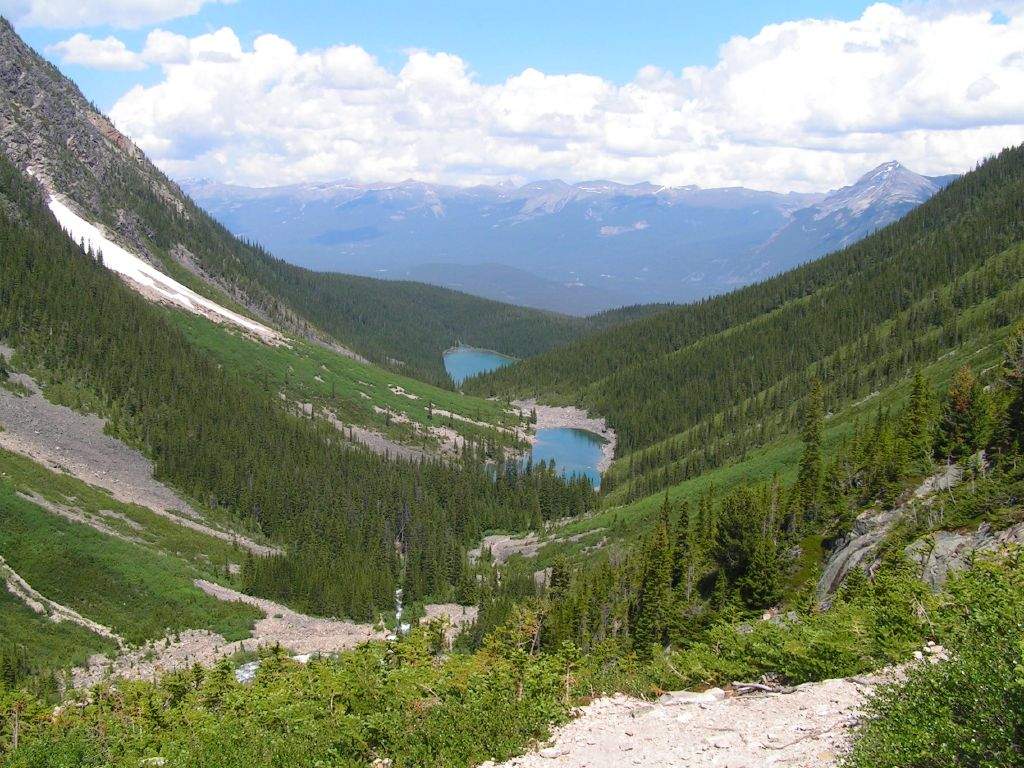
5th July: Well, we're back from holiday, but I'm still suffering from jet lag. I did put on some clothes from my 'garage wardrobe' on arriving home from work, with the full intention of going in the garage, but promptly collapsed on the sofa and watched the French Grand Prix highlights on the video, which sent me to sleep nicely... As for the holiday, we had a great time, in Canada. 3 nights in Toronto, so went to Niagra and up the CN Tower, then flew to Vancouver where we picked up a huge motorhome, in true North American tradition. We then travelled from Vancouver to Jasper, down through the Rockies to Banff, and then flew home from Calgary. Although not really related to the build of a Mojo, here are some highlights to give a flavour of the trip:
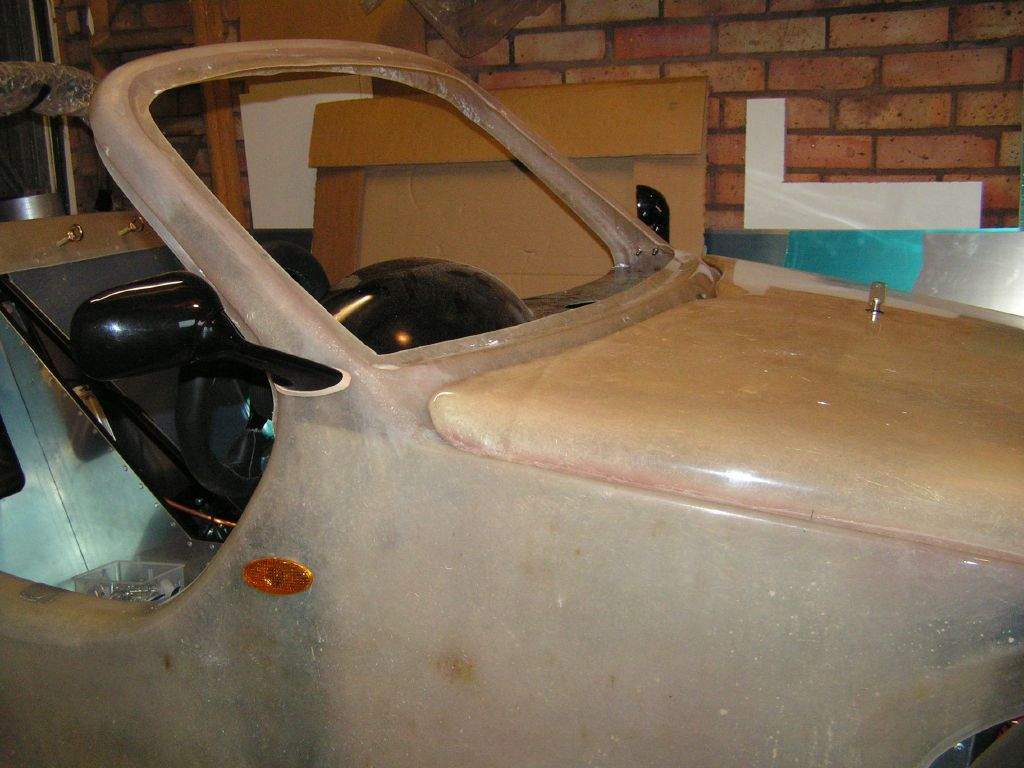
6th July: 1h30m: OK, the build resumes! You may remember that I had a go at making a spacer wedge for the wing mirrors. Well, the mk1 version was less than perfect, so I decided to have a go at mk2! This was much more successful, so the tub was drilled out and the mirror trial fitted- I think it looks good (apart from the unpainted MDF that is...). 7th July: 2h45m: First of all, congratulations to Steve Knee for passing SVA first time round! I am now very jealous, having been a month or 2 behind Steve through the whole build. At least motivation is now at a new high! Made up another spacer for the left hand mirror, I was a bit quicker this time (jet lag wearing off now maybe?) with equally good results.
Moved on to the cycle wings. I had been trying to decide on the best method of locating the bighead fasteners in the right place in relation to the holes I drill in the cycle wing, this is what I came up with:
In my case, I didn't leave the filler for long enough on the first cycle wing, and 2 of the bigheads fell off when I removed the cycle wing. Thankfully, due to the pattern on the base of the bighead, I was able to work out where it had been fitted and re-fix. 8th July: 2h00m: With all 8 bigheads temporarily fixed in place with the body filler, I then fibreglassed them in place. I also overlapped a couple of layers of fibreglass mat over the area that I had accidentally removed from one of the cycle wings, to give some strength to the filler I will then use to smooth off the outer surface 9th July: 1h45m: Checked that I could fit the cycle wings back on the stays. I had realised that this wouldn't be an easy 'drop on' procedure, as the bighead fasteners point in towards the centre of the wheel. It is therefore a matter of dropping the bigheads on the rear of the cycle wings onto the bracket, and then using a bit of brute force to flex the front bracket and ease the cycle wing into place. Not easy to describe, but the upshot is that they did fit! Bolted the wheels back on to check alignment, which looks spot on. Cool. While fitted, I checked the cut outs in the cycle wing around the stays, and marked where I wanted to remove a bit of extra material to even things up. I also marked where I needed to repair the over-large cut out from the boo-boo in June. I then removed the wings, finalised the cut outs, and used some body filler on the 'mistake'! Next job- smooth the edges of the cycle wings. Ideally I wanted to avoid putting trim around the edge of the wings to get through SVA- it doesn't look great, can be a pain to remove (I think you have to glue it in place these days), and actually, I think that having smooth edges is probably a good idea anyway! So, out came the wet & dry paper again, and I sanded a nice radius around the whole outside edge of the wings. This should do the job for SVA, and 'it feels nice too'...
I moved on to the internal outer side panels. I am going to copy the latest Sylva demo car and fit some pockets, so I did some accurate measuring and cut out a hole in each with a jigsaw. I also marked out some extra rivet holes to attach the panel to the diagonal chassis rails. I then drilled both panels all the way through and into the chassis/fibreglass (this panel attaches to both). As these panels aren't really very structural on my chassis, I decided to increase the hole spacing so the rivets don't look too 'fussy' against the black vinyl that I will trim these panels with. I note from Steve Knee that for earlier Mojos, which don't have the additional diagonal bracing in the side of the chassis (see here), Jeremy Phillips is now recommending that the side of the chassis in this area is skinned with thicker aluminium on both sides. This would I guess prevent a pocket being installed. Speak to Jeremy at Sylva for details...
11th July: 2h45m: Made a start on trimming the driver's side internal side panel. In order to make this feel slightly more luxurious (if such a term can be used in reference to the Mojo!) I am putting a thin layer of foam underneath the vinyl, and by 'thin', I mean about 1mm, so it won't look like an antique sofa! The foam I am using is actually the stuff you use under laminate flooring, I had some left over from doing the kitchen a couple of years ago, and it seemed to fit the bill perfectly! I secured the foam in place with double sided tape. I have not allowed for any overlap of the foam except on the top edge and also around the opening into the map pocket, to make sure I don't get the feeling of a sharp edge underneath the vinyl. Elsewhere I just cut the foam off flush with the edge of the panel. Next, I cut out a section of vinyl, which was about 40mm oversize all the way around the panel. I then secured one edge of the vinyl by wrapping around to the back of the panel and using some PVA adhesive (the stuff I had from Car Builder Solutions to stick on the heat reflective mat). The adhesive needs to be left for about 10 minutes after applying to both surfaces before actually bringing them together. I then secured the opposite edge in a similar way, making sure there was some reasonable tension in the vinyl to avoid wrinkles, and then finally glued the top and bottom edges. Finally, I cut a slit for the map pocket and folded the vinyl through the hole and glued in place. I'm pleased with how this has worked out. Now I just need to try and locate the holes I drilled in the aluminium, which are now covered with the vinyl!
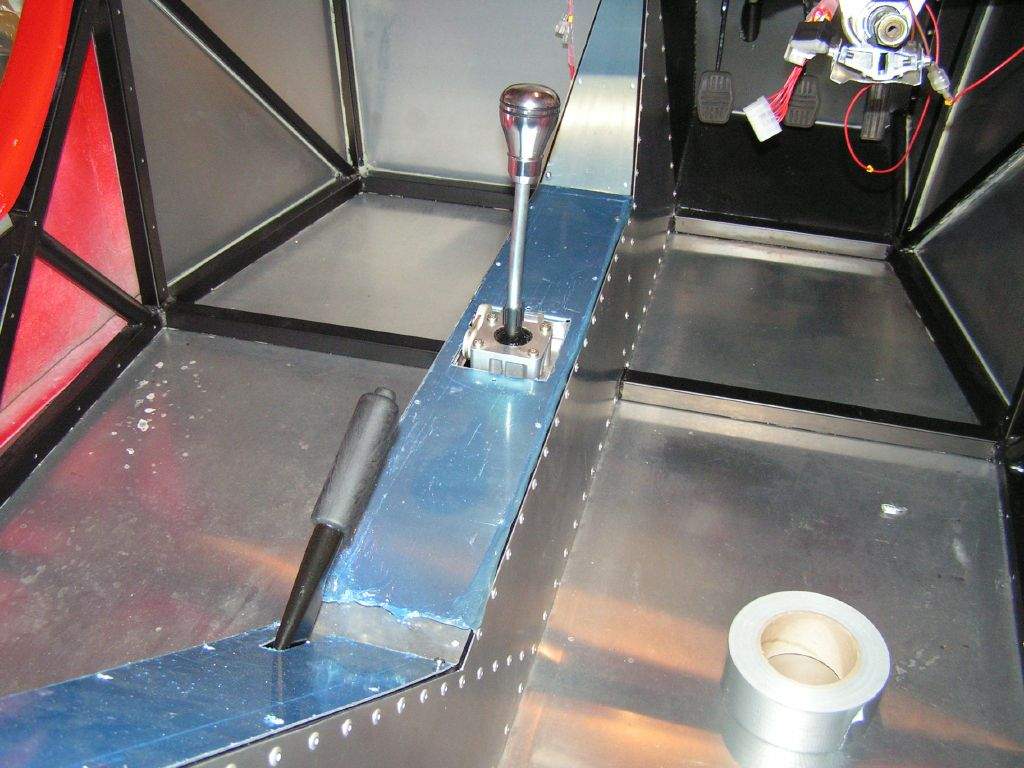
12th July: 2h15m: Printed out an SVA application form, I'm hoping I'll be ready in about 4 weeks! I'll send the form off once the body has been dropped off for spraying. Talking of spraying, this is one thing that has caused some headaches. Getting quotes locally, I have struggled to get a reasonable deal, so I'm planning to hire a van and take the body over to Lincolnshire to use the sprayer that has done the Sylva factory-built spray jobs in the past. I'll need to hire a van again to pick up the finished article, but I should still save a worthwhile amount, plus I need to pop over to the factory anyway to pick up some sidescreens (to be fitted post SVA of course...) Trimmed up the left hand side panel... 14th July: 3h30m: Started cutting out the tunnel top panels. I'd been thinking for a few days about how many sections to do this in, and also how to attach a gear lever gaiter. In the end, I decided to go for 3 separate sections. First up was the middle section of the tunnel, which has a large cut-out in the middle to fit around the gear lever. Part of the mechanism sits above the level of the tunnel, hence the need for a gaiter. At the rear edge of this panel, I've left a lip which bends up underneath the handbrake lever. This will mean I can have a really small hole for around the lever, rather than having to pass a panel completely over the lever. Hmm, does that make sense? A picture would help... To secure the gaiter, I made a separate surround plate, this will be bolted to the tunnel panel along with the gaiter before final fitting, and then the whole assembly dropped into place together. I then cut out the rear tunnel panel, with a a small slot to accomodate the handbrake lever. Hopefully you can now see what I meant about having a nice small cut out for the lever...
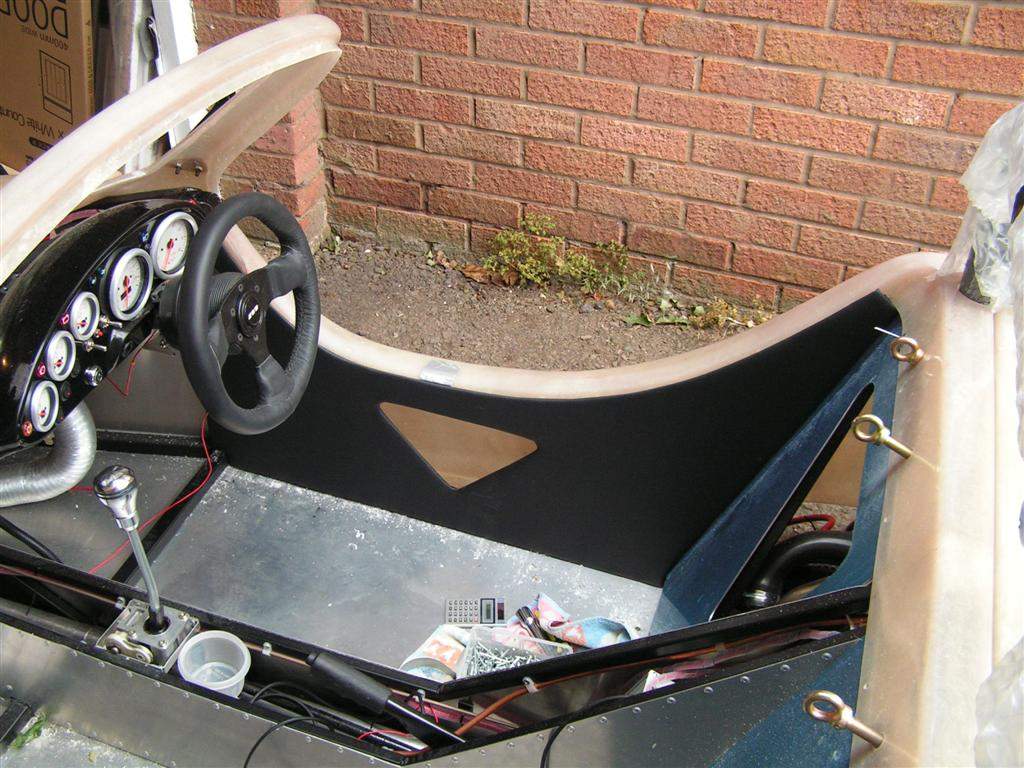
I want to incorporate a remote serial port for the ECU in the rear tunnel panel somewhere, I've got hold of a panel-mount port so that I can make an extension from the ECU box. This will mean I can plug a laptop in without removing the tunnel panel. Convenient, and very F1! However, I'm not sure where to mount it at the moment, so I've not cut out a hole yet... 15th July: 1h30m: Made up a 'prototype' gear lever gaiter, using a bit of the spare foamy-stuff (the stuff that I am using behind the vinyl elsewhere). I think once transferred to vinyl this should look good. Started to have a look at filling the gap between the body and the dashboard. I chose the height at which to mount the dash based on being able to see the speedo and rev counter through the steering wheel, which means my dash is mounted slightly lower than in some Mojos. Hence, I have a gap around the front edge of the dash of about an inch. I plan to follow Sam Howell's solution, using a thin strip of aluminium covered in vinyl. Sounds simple, but will be a bit of a fiddle in practice, I think! 16th July: 1h30m: Fitted the rear bulkhead inspection panel using rivnuts & dome headed bolts, and then started cutting out a strip of aluminium to use in filling the dashboard-to-body gap, which I think I will now call the 'dash-body trim panel'!
17th July: 5h00m: Spent ages today on the 'dash-body trim panel'. I made this in 2 halves to make life slightly easier, and joined the two sections in the middle with a back plate and rivets. I also had to make up 5 angled support plates, which are attached to the underside of the front edge of the dash. Rivnuts were the order of the day! After lots of fine tuning of the exact shape of the aluminium strip, I was happy with the fit. I have managed to shape the strip into the windscreen pillar profile at each end, which will cover the threaded sections from the wing mirror attachment points. With the aluminium finished, I then trimmed the 'dash-body trim panel' in vinyl. Here is the end result:
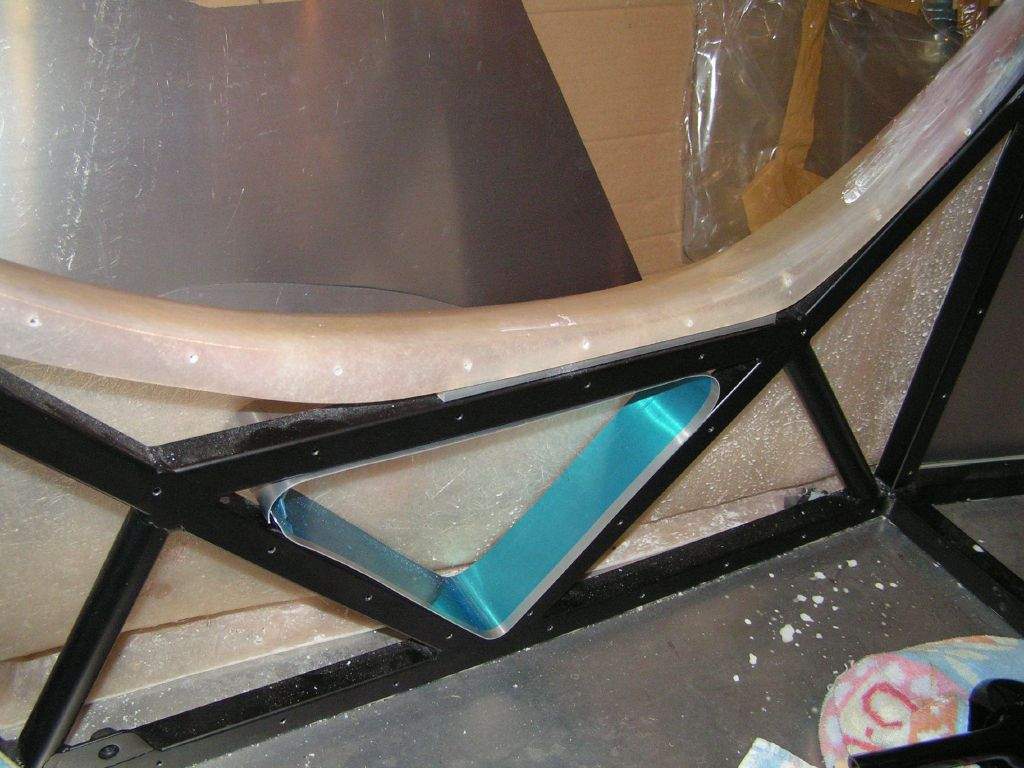
18th July: 0h45m: Measured up for the map pocket surround on the driver's side. For the rest of the day, we had a family gathering at our house, including Mum & Dad, Sister, Aunts & Uncles, Cousins, you name it... Thankfully the weather was OK for the barbeque. 19th July: 3h30m: Phoned Bill, the sprayer Jeremy Phillips uses, and booked the car in for spraying this Friday! Yikes, better get a move on... Also got a van sorted for the journey over. Cut out the map pocket surround, bent it to shape and then trial fitted. After a bit of tweaking to the curve radii and the width of the aluminium strip, it was a snug fit in the triangular part of the chassis. I had planned to carpet the interior of the pocket, but I think I may now leave the aluminium exposed as it looks quite neat. In that case, I will just cover the back surface of the pocket (which is the inside of the fibreglass body tub) with vinyl. With that success, I tried the map pocket surround on the left hand side to check I could use the same measurements, and apart from needing to be a couple of mm less deep, it fitted fine. This second surround was then made up and fitted in double quick time. I don't think it will be necessary to secure the 2 pocket surrounds- they are a snug fit in the chassis, and will be eventually sandwiched between the body tub and the trim panel.
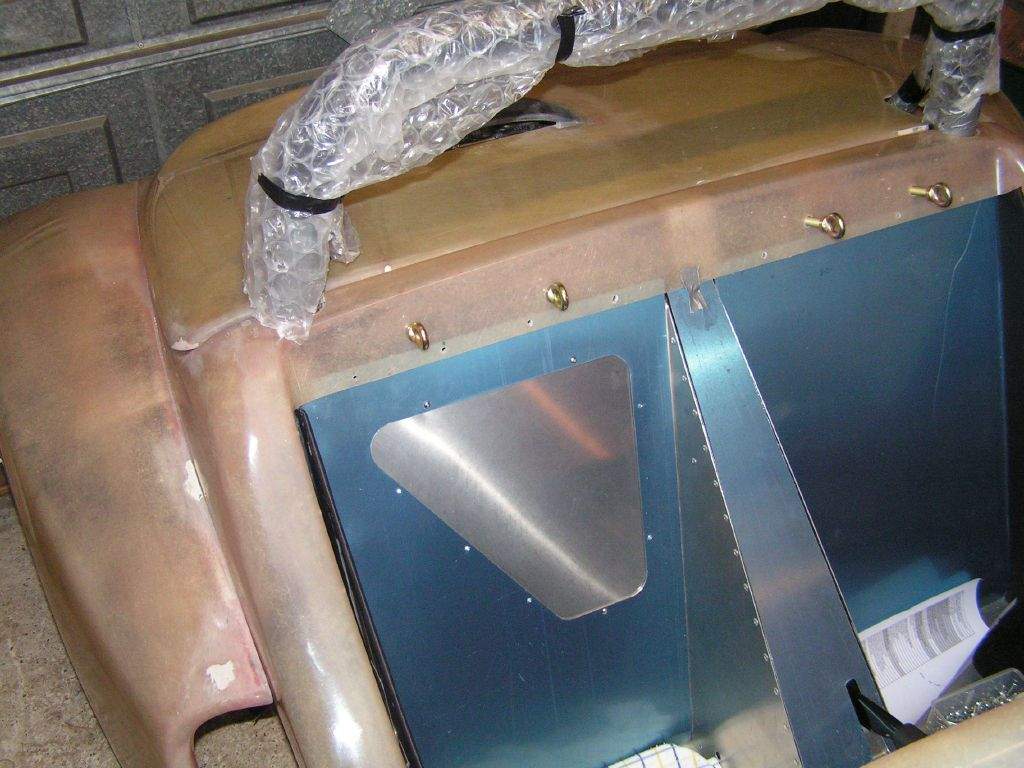
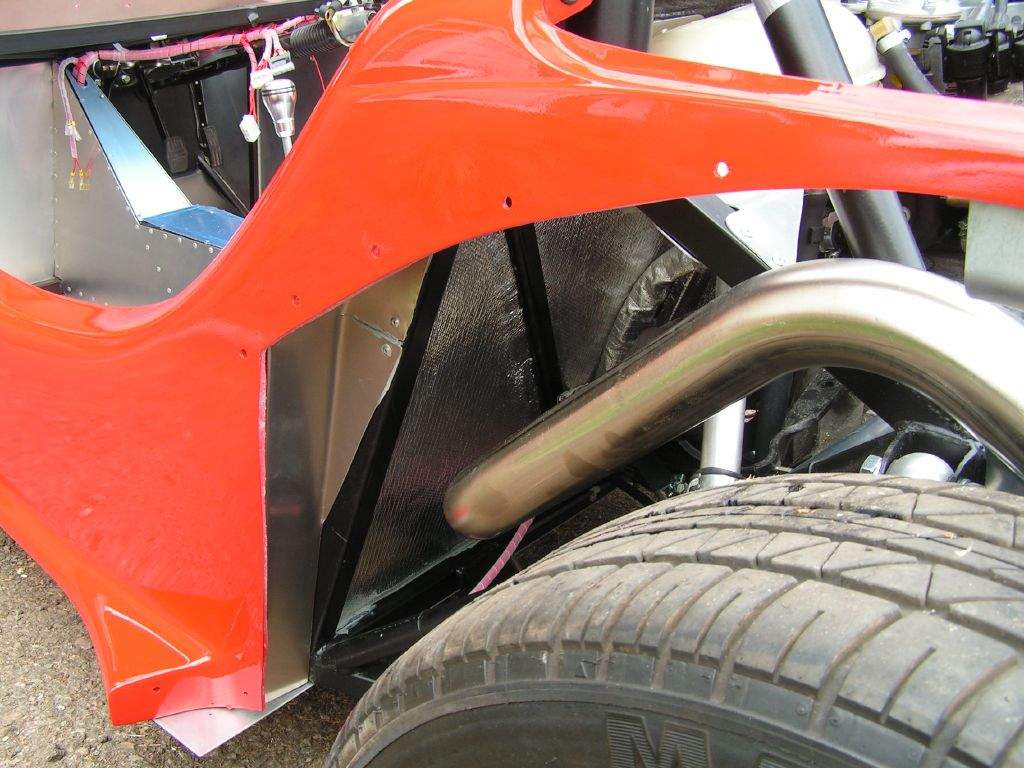
Moved on to make some cut outs for the rear number plate lights. I had picked these up from a Clio in a scrap yard a few weeks back. They are easy to fit, as they have a sprung loaded securing clip, so just need 2 rectangular cut outs. Job done! 20th July: 2h00m: I have a list of jobs to complete before the body goes off for spraying, and tonight's job was to design a panel to fill the gap between the chassis and the body just ahead of the rear wheels. I believe that most Mojos have this area left alone, but as I plan to use my Mojo in wet weather, I want to reduce the chances of water getting in, and also stop a build up of general road grime in this area. Basically, the body sits a couple of inches away from the chassis, and hence there is a gap between the inner trim panel and the outer shell of fibreglass (I've used some of this area for the map pocket). So, the plan is to make up a panel of sorts, the design of which I pondered for about 45 minutes, tape measure in hand and puzzled expression on face! I eventually came up with a plan, which secures the panel to the body in two places (both concealed once the rear wing is fitted) and also attaches to the chassis. Making the panel was 'entertaining' to say the least, and as usual involved bending and cutting. Another job to finish off tomorrow... 21st July: 3h45m: Finished fine tuning the right hand in-fill panel, and then drilled the fixing holes into the body and the chassis. This is the end result:
(You'll note that from this point on the photos were taken with the body back from the sprayers- I forgot to take photos for about a week!) The panel is a fairly snug fit, but I will seal it in place with silicone sealant of some sort when I finally fit it in place. I had to make a small cut out towards the bottom to allow the battery feed and throttle cable to pass though. Removed the left hand rear wing, so I could move on to the left hand side in-fill panel, which unfortunately was not quite a mirror image of the first! Even so, as per usual, making a similar panel to the first was a lot less time consuming than the original. Began to remove stuff in preparation for taking the body to the sprayers- dashboard, interior panels, brackets, locks, etc etc, and removed the engine cover and bonnet. Did some final sanding of the rear wings, and then started to dismantle the dashboard- I'm going to spray this myself! 22nd July: 3h00m: The last chance to do pre-spraying preparations! The last few days have been a bit manic, but the light at the end of the tunnel is getting brighter! Removed the flash lines from the bonnet, and smoothed the raw edges of the fibreglass to try and avoid as many sharp edges as possible (I hope you are reading this, Mr. SVA tester...). I also trimmed the lower edge of the headlight housing slightly- I was concerned at how close this was to the upper wishbone, worried that a severe bump would have the wishbone making contact with the fibreglass, so I opened up a few more mm of clearance. Removed the main body tub for the first time in a few weeks, and went around it with a fine tooth comb to check for areas that needed a final sand. I then gave all of the fibreglass panels a wash with warm water to remove dust and dirt. 23rd July: Lots of time spent travelling over to Lincolnshire to drop off the bodywork at the sprayers. Had a good chat with Bill, seems like a nice chap. He hopes to be finished for next Friday, but there is a chance it might take a little longer, so I'm advised to phone next Thursday. Then drove over to Jeremy Phillips' new workshop in Hagworthingham to pick up a pair of sidescreens. Inevitably, we chatted for over an hour, which was great- we could have gone on longer were it not 5:15 and well past JP's going home time! Sounds as though the R1ot (a new Sylva with R1 power, mid engined, inboard front shocks and minimalist bodywork) should be up and running in a few weeks- the chassis was off at the powder coaters. Also had a nosey at the hood that is now available for the Mojo. This uses a U shaped frame that sits in 2 sockets set into the side of the tub just to the rear of the sidescreens, this runs up and over the cockpit area to support the centre of the hood. The hood itself then runs from the top of the screen to the top of the roll bar, secured in place with poppers. It actually looked surprisingly good, I think I'll be getting one, not only for wet weather driving, but also as a tonneau cover. 24th July: 5h00m: Trimmed the sides of the floor panel- I had cut this roughly to size when the floor was originally fitted, but with the body fitted it was obvious that it needed chopping back a little more. I had very cleverly remembered to mark out the edge of the body before it went off for spraying (!), so using a combination of the jigsaw and metal cutters, I removed the unwanted aluminium. I moved on to organising the battery cable and throttle cable down the side of the car. I spiral wrapped/sheathed the battery cable for extra protection (I don't really want it wearing through and shorting out on the chassis...) and then rivetted some cable tie platforms in place to secure. I also used these to secure the throttle cable, once I finalised a routing that didn't foul the front lower wishbone, but still retained the straightest cable run possible. Next job- figure out how to make a stop on the clutch pedal to prevent it from moving back towards the driver as the cable was adjusted. I had been intending to use a similar method to the accelerator pedal, with a bolt that could be adjusted in or out, but fitting this into the footwell to make contact with a suitable part of the clutch pedal was proving difficult. Then I had a brainwave- why not attach something to the pedal instead, that made contact with the chassis rail? In fact, the pedal had 2 convenient holes in just the right spot, so I made up a little bracket out of the chunkiest alumnium I could find amongst the 'stocks'. The first attempt, frustratingly, snapped when I attempted to put a bend in the bracket, so I had to start from scratch on the second attempt. This time I didn't make the bend quite so tight, and everything stayed in one piece. After a bit of fiddling getting the pedal to sit in a reasonable place, I was happy with the result. I could then take up the slack in the clutch cable without the pedal moving back- success!
I then opened up some of the holes in the chassis in order to fit rivnuts. These had been drilled through the body along the front edge with a smaller drill bit. In some cases, the holes in the chassis were left alone where I planned to use rivets to hold the body in place, but in some places I needed to use bolts:
These bolts will also help secure the body, in place of rivets. I used countersunk rivnuts in order that the body sits flat against the chassis. I think I will also use some sealant on the join, but not the car body sealer I have used on the aluminium panels, just in case the body ever needs to come off! Started to dismantle the dash in preparation for spraying. 25th July: 3h00m: Watched the German GP- what a great race (for a change...). Great to see Button doing so well at the moment, let's hope it continues. Dismantled the rest of the dash, this took ages to connect up so the thought of doing it all again does not really enthrall me! Started work on the heat reflective matting that I am attaching to the engine side of the rear bulkhead. The exhaust is very close to the bulkhead, and I had noticed the heat build up when driving the demo car- hopefully the matting will help (the demo car doesn't have any). This was a bit of a fiddly job, as I had to attach the matting whilst avoiding any areas where the panel came into contact with the chassis, and also had to work around the inspection hatch on the driver's side. 26th July: 3h00m: Finished fixing the last section of heat reflective mat to the bulkhead. Cleaned up the floor of the car, which was covered in swarf and all sorts of other rubbish. The garage hoover came in handy! I then moved on to the oil catch tank. I had bought a Sigg-type aluminium bottle a while ago (they were going cheap in Halfrauds), so I just needed to work out how and where to mount it. I had been given the idea of using a bike (as in 'push bike') bottle cage, so I had a rummage and found one in the garage (mountain biking has long been a hobby of mine, so I have accumulated a lot of MTB bits and pieces over the years!). Then it was a matter of deciding where to mount the bottle, both for ease of mounting, and ease of plumbing in the 2 breather hoses (one from the cam cover, one from the block). The obvious place was mounted to the rear top chassis rail, just under and to the left of the left hand carb. So, ho-hum, time to make a bracket! I bent this out of the thick aluminium plate again, taking care to bend around a radiused edge rather than a right angle to avoid the snapping fest that happened the other day... The bracket allows me to clamp around the square chassis rail, avoiding drilling the rail, and meaning I can easily change the catch tank location in the future if need be. With that sorted, I then had to make some holes in the catch tank! Firstly, I chopped the handle off the screw-in cap on the top of the bottle, and drilled a hole straight down through the top, just large enough to take a short length of 15mm copper pipe, with a snug fit. The cam cover breather can then be connected straight to the pipe with 15.8mm heater hose. I then drilled 2 holes, just smaller than the thread on some spare brass fuel hose connectors I had lying around from fuel pressure regulator No.1 (the one I broke!). I didn't have a tap of suitable size, but the bottle is made of such thin aluminium I was able to cut a thread of sorts by just winding each of the connectors into place- the taper thread on these connectors helps. The tank breathes to atmosphere, so a tight seal is not really needed anyway. So, it was then a matter of connecting the block breather (with a spare bit of fuel hose) and the filter to these two connections, and hey presto, catch tank done. Finally, I filled the transmission with oil. This is smelly stuff, especially when you spill it all over the floor... Whoops! The manual says 3.1 litres should have been needed, but I guess I didn't quite empty it fully! 27th July: 1h45m: My attention turned to getting the wiper motor working. I had a plan for how to do this, but wanted to test my theory (the Uno wiper & switch wiring is difficult to replicate with a toggle switch). My plan involved using a relay, which would enable me to use the intermittent function, which is possible on the Uno wiper as a little box of electronic tricks is attached to the wiper mechanism to control such things. However, in my case, the motor doesn't seem to want to work on the intermittent setting... I took a step back and wired up a bit of a test rig, to prove that the motor worked OK. Constant speed, fast and slow, both work, and the wiper park seems to work too, but not the intermittent... Hmmm. So, plan B is to just wire up the wiper as simply as possible, ie on or off. I can do this easily by switching from an ON-OFF-ON toggle switch to an ON-ON, (not an ON-OFF as to park the motor requires a power feed to the appropriate wire). If in the long run I get hold of another Uno wiper, I can have another go at getting the intermittent to work again. 28th July: 2h30m: Marked out the the centre and rear tunnel top panels for drilling, then drilled through in to the chassis with a 4mm drill. I then opened up the holes in the chassis to 6mm to take the rivnuts (I'm making the whole of the tunnel top removable for serviceability, if that's a word!). Fitted the rivnuts in place, and then temporarily fitted the panels with a few 4mm SS button head bolts- the panels are safer fitted than left lying around the garage!
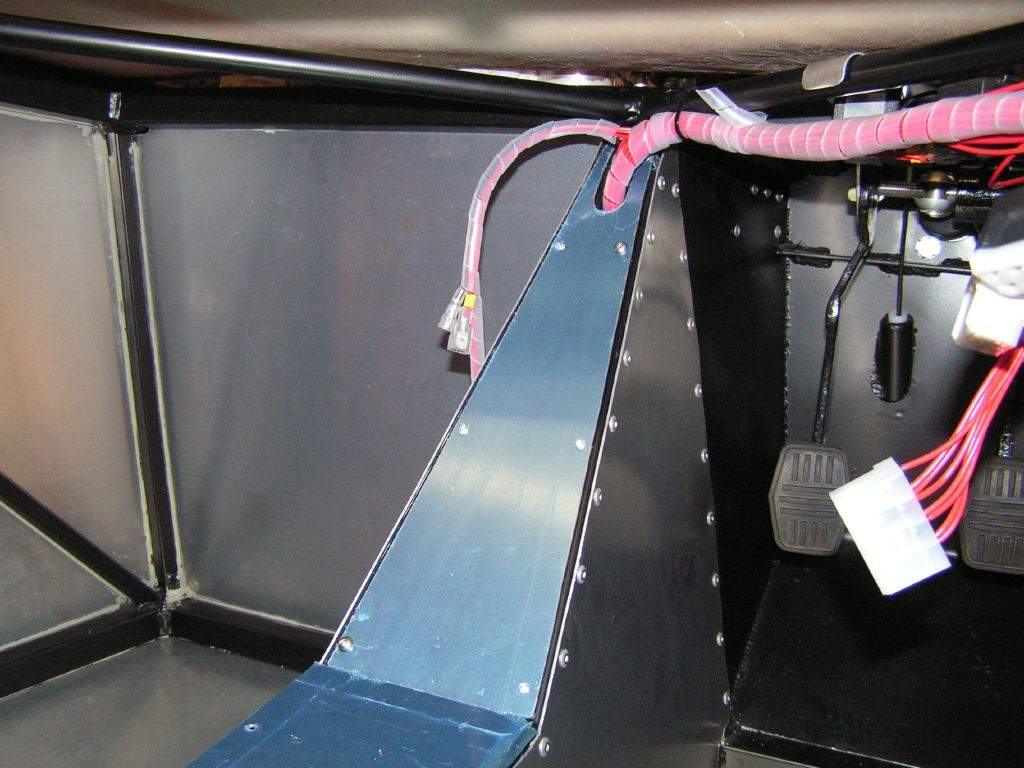
29th July: 3h30m: Despite having made a list of jobs to do before the body finally goes back on, I kept thinking of more things to do! Tonight's first job was to cut out and secure the front section of the top of the tunnel, as I won't be able to get a drill into position to drill the tunnel once the tub is in place.
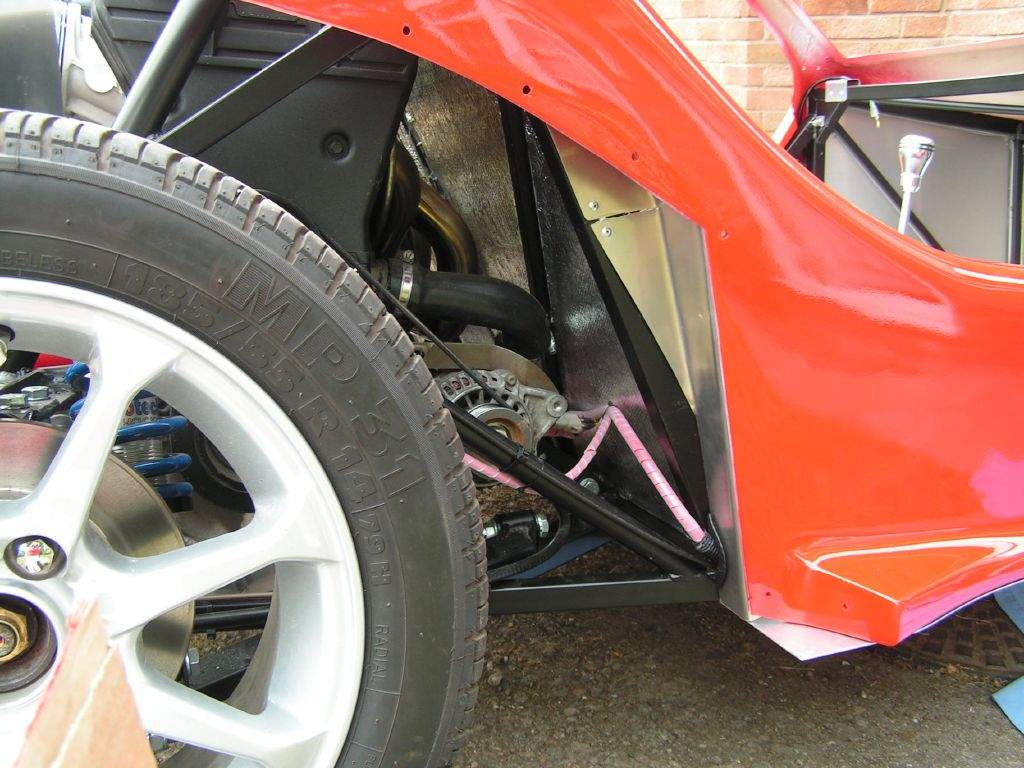
Next, I attached the in-fill panels to the side of the chassis with rivets and car body sealer- again, I had realised that I wouldn't be able to get the rivet gun into the gap once the body was in the way. I have added a bit of U section trim around the cut out in the right hand panel (where the battery cable and throttle cable pass through) to prevent chafing of the cables. Went round the car and chopped the excess from all the tie wraps I could find! Finally, I gave the car another hoover, as from now on I'm going to be paranoid about damaging the paintwork! 30th July: 0h30m: Set off for Lincolnshire once again to pick up the bodywork. 2 and a half hours later I had a very red Mojo in the back of the Transit! After another non-eventful journey home, I unloaded the bits from the back of the van with Liz's help. Bill had wrapped all of the parts in bubble wrap, with the exception of the main tub, which didn't really need protecting. Liz's mum and dad arrived a little later in the evening, and so between the four of us we carefully dropped the tub back onto the chassis (there is nowhere else to store it!). This was a little nerve wracking, but it went into place with no mishaps- phew! 31st July: 7h30m: I went round the car to make sure there were no other jobs to be done with the body removed, while I still had the option of lifting it back off. I didn't come across anything, so the next job was to finally secure in place the 2 rear bulkhead panels, so say goodbye to easy engine access!
After rivetting those into place, I decided the time had come to finally secure the main tub. I started with the rivets through the underside of the floor, which meant getting one side of the car at a time up on my wooden ramps.
The only slight problem on the drivers side (which I had noted a while ago) was that the tub doesn't meet the floor towards the front of the car, there is a gap that opens up to about 10mm at the very front. In the end, the solution I came up with was a little bit agricultural, but it worked- I used the trolley jack to bend the floor panel up to the tub, rivetted in place, and then removed the jack, which allowed the floor to move back down a little. I then rivetted the floor on the other side, with my hands becoming progressively weaker as I went along- these are big rivets that take quite a lot to 'pop'. With the tub attached along the lower edge, I gave my hands a rest and moved on to fixing the pedal box cover, which is bolted in place into rivnuts in the chassis. A couple of the holes in the tub were not quite aligned, so I had the scary job of elongating the holes in my newly painted bodywork by a millimetre of 2.
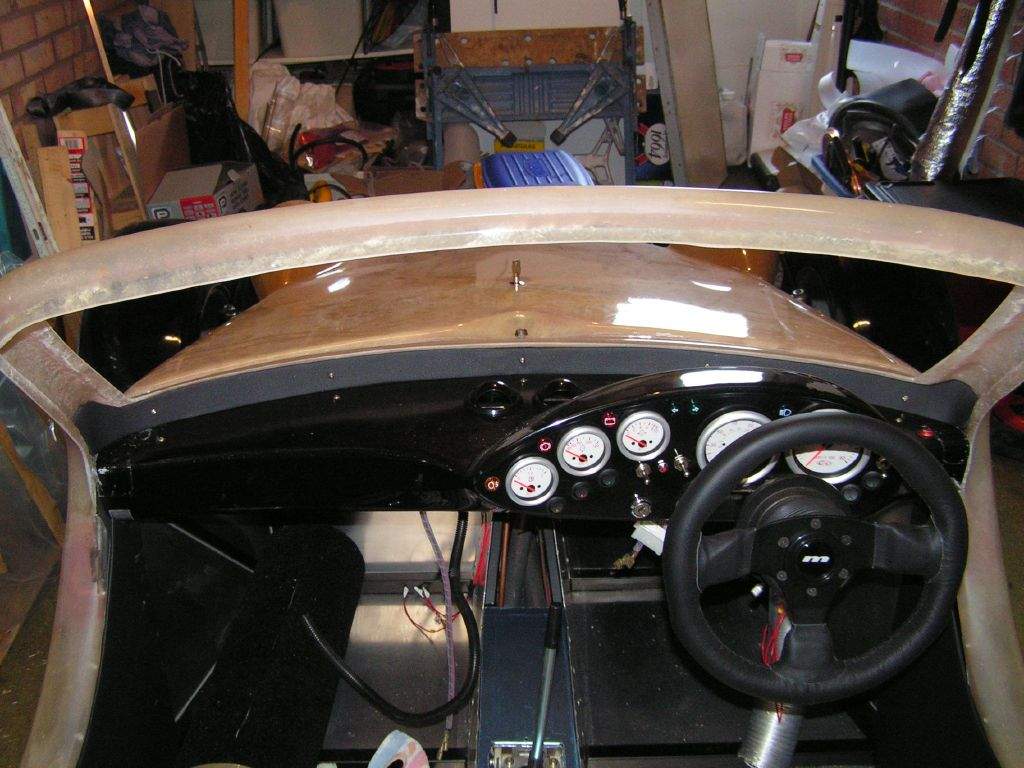
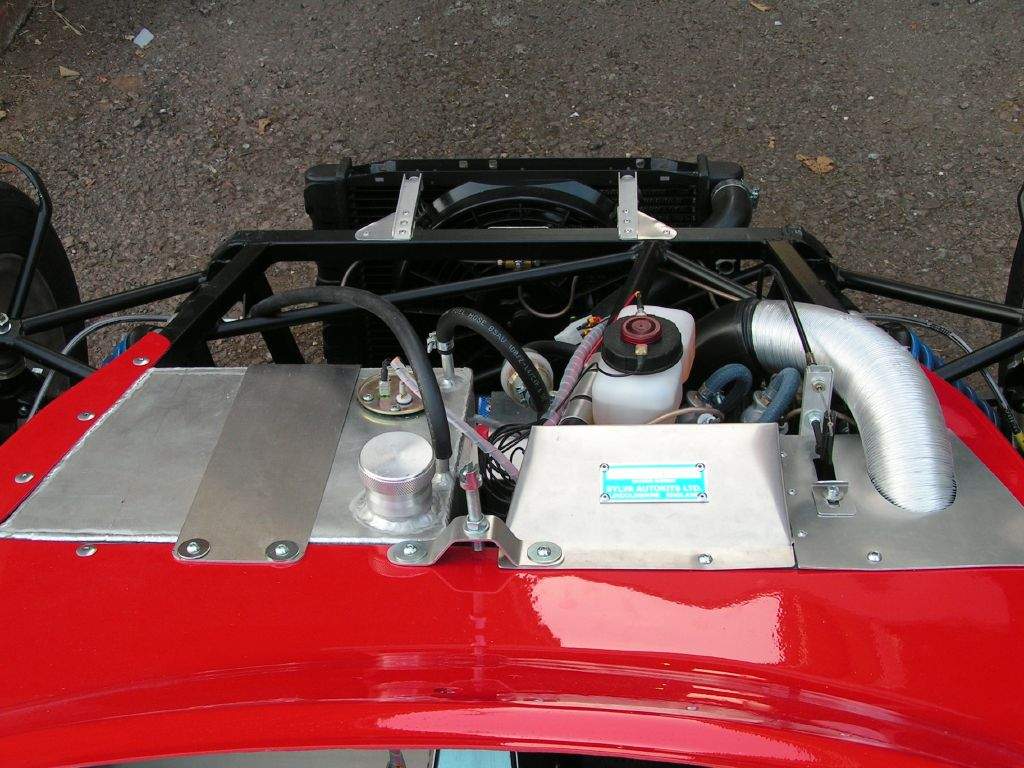
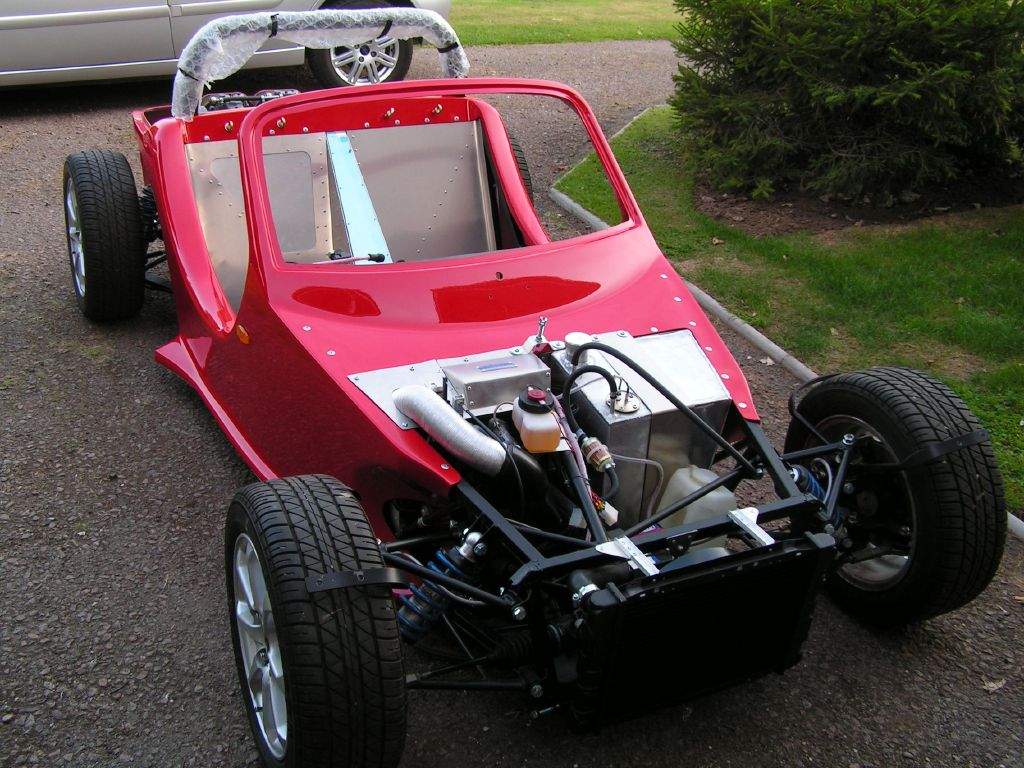
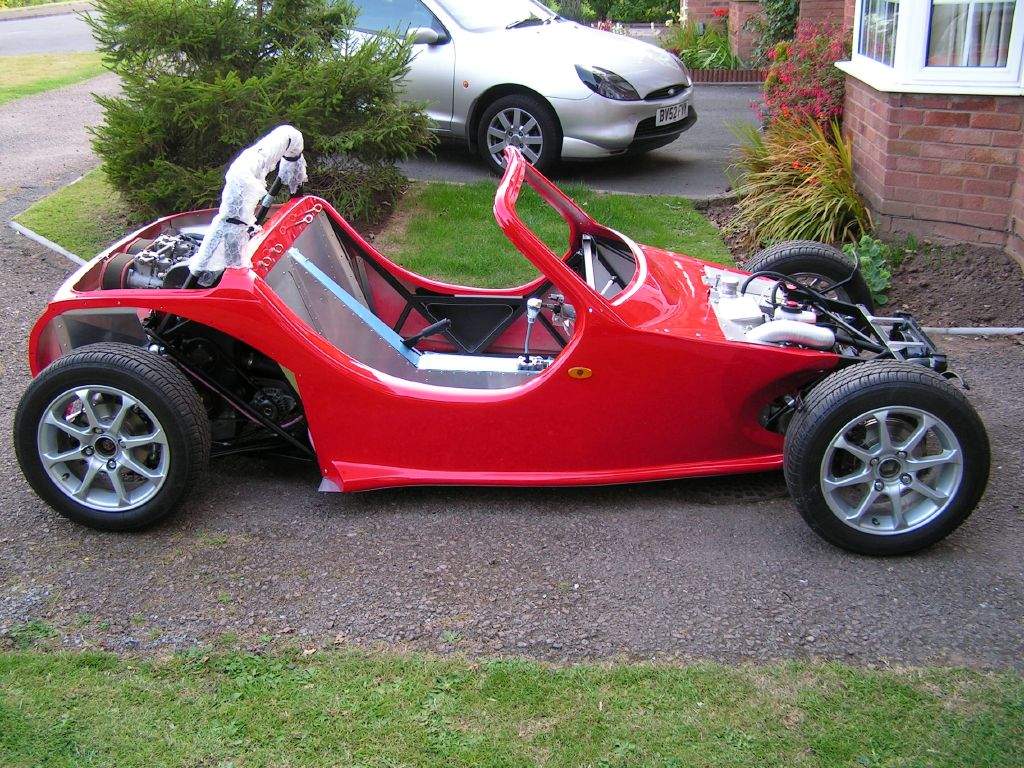
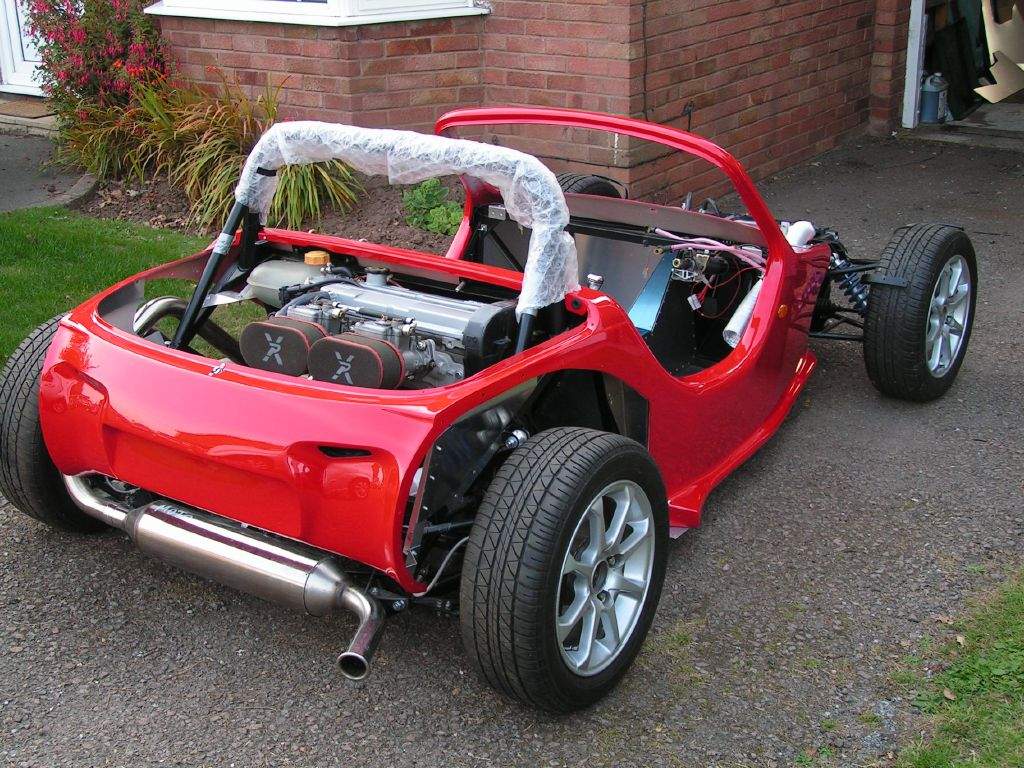
With my hands only slightly recovered, I fitted the final rivets to secure the tub in place- both around the upper front edges, and also to the top of the rear bulkhead. The body isn't going to be coming back off in a hurry... My hands really were finished at this point, so I busied myself with a few less strenuous tasks:
Here's the end result:
Total time spent during July: 42h00m
|
||||||||||||||||||||||||||||||||||||||||||||
|
|
||||||||||||||||||||||||||||||||||||||||||||||