|
|||||||||||||||||||||||||||||||||||||
|
|
|
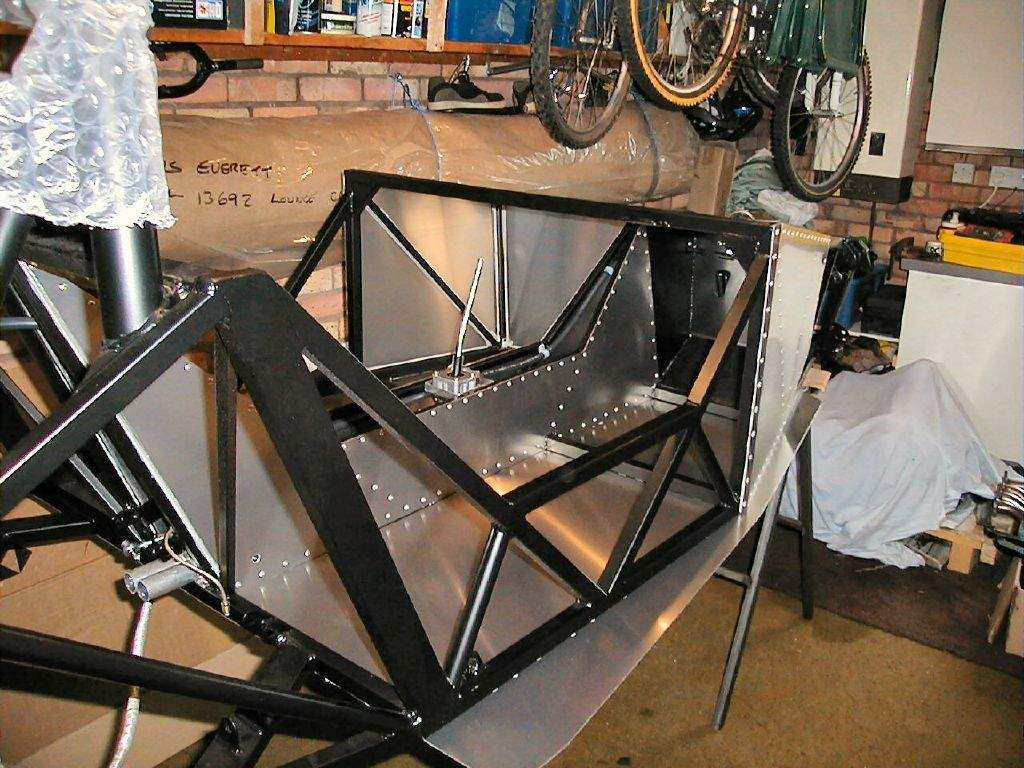
1st November: 4h00m: Enlisted
the help of Liz to turn the chassis back over, and then lifted back onto the build stands.
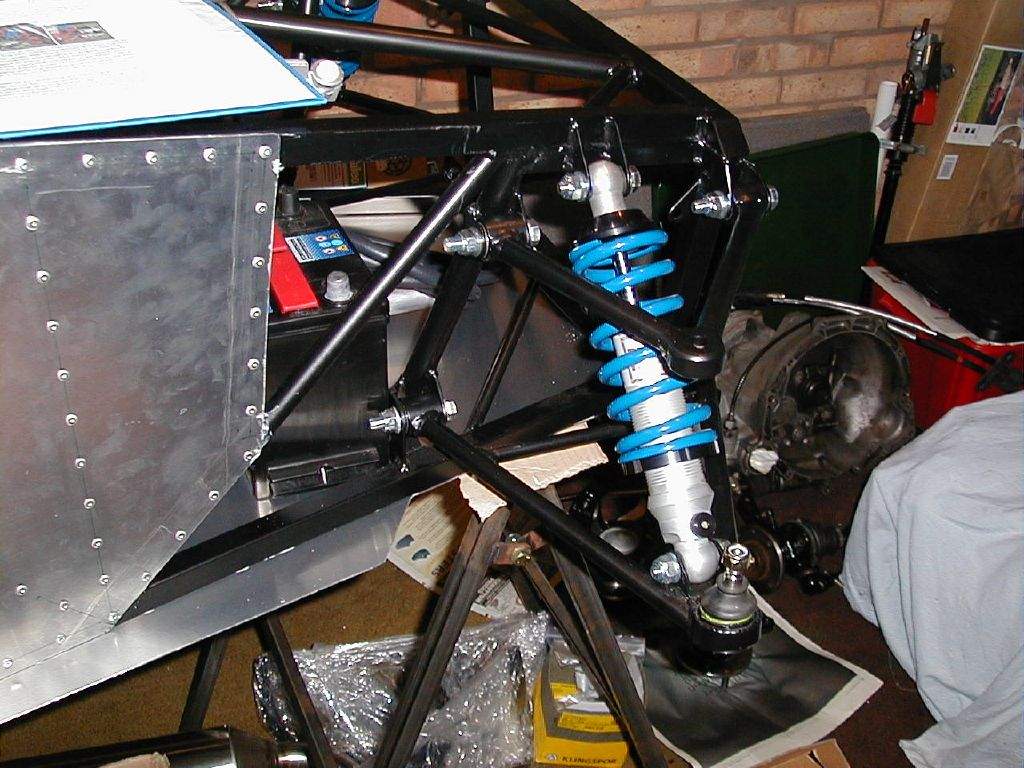
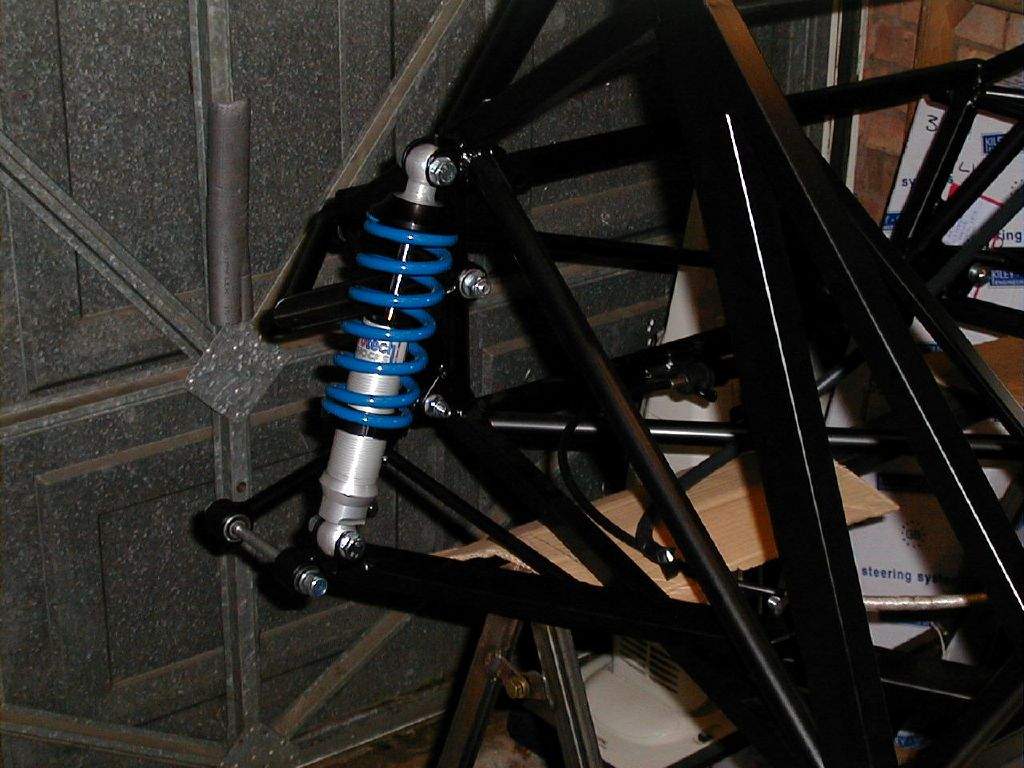
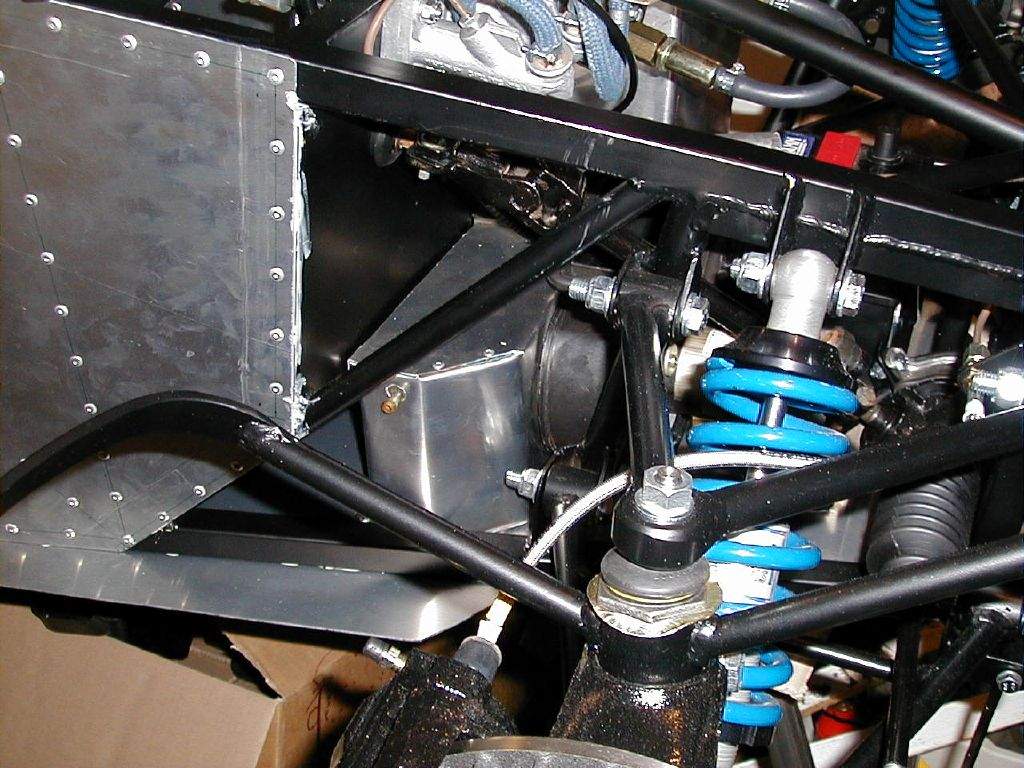
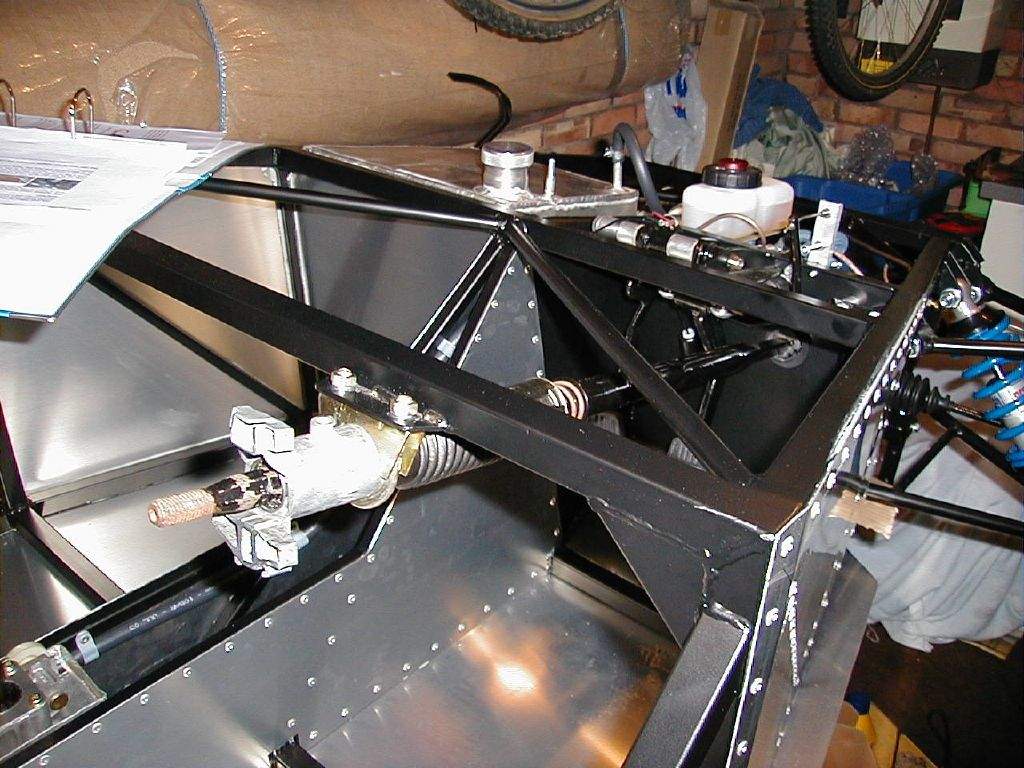
As the next job would be to start fitting the suspension, a few parts required painting- the front uprights that were new from Sylva and the 4 rear upright adapter brackets. I also painted the two gear linkage rods. Then I began the exciting job of fitting the suspension. All of the suspension wishbones (2 at each corner), and four spring-damper units were bolted in place. This made a big difference, visually. It was beginning to look like it might become a car one day!
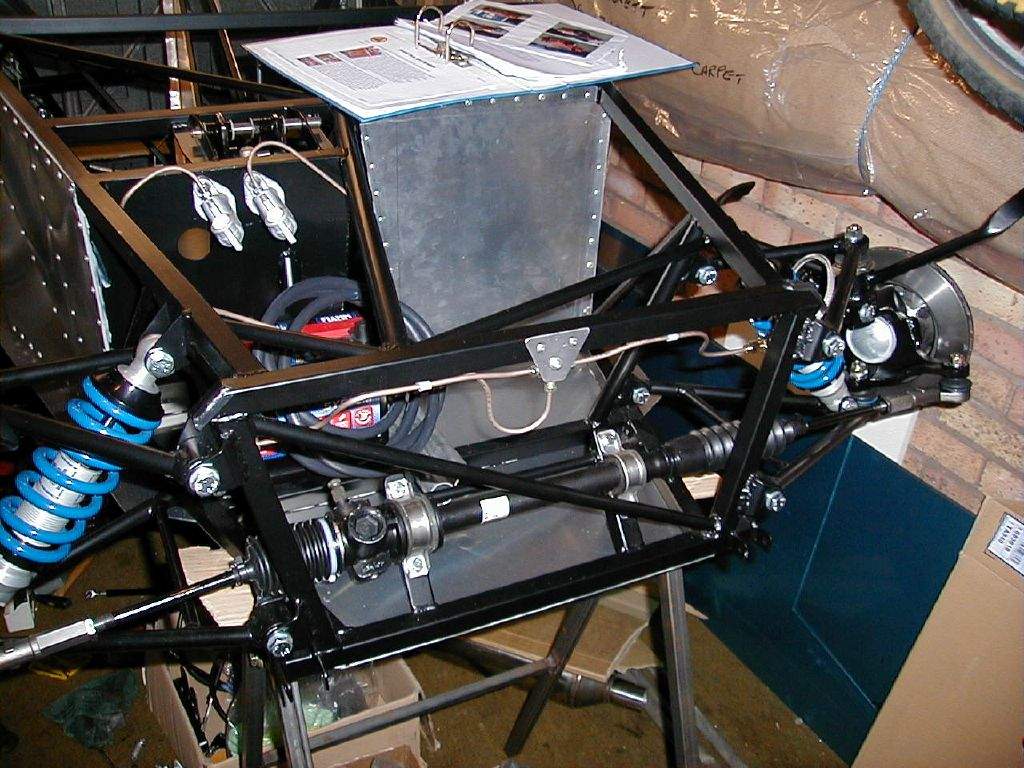
2nd November: 5h00m: The Hammerite was dry enough to start fitting the suspension uprights. I started with the offside front- first step is to fit the top ball joint into the wing stay adapter, then bolt the adapter into the Sierra upright, then offer the whole assembly up to the wishbones and bolt in place. Next, I fitted the steering rack, and then the other 3 uprights, and then the OSF disk, caliper & pads.
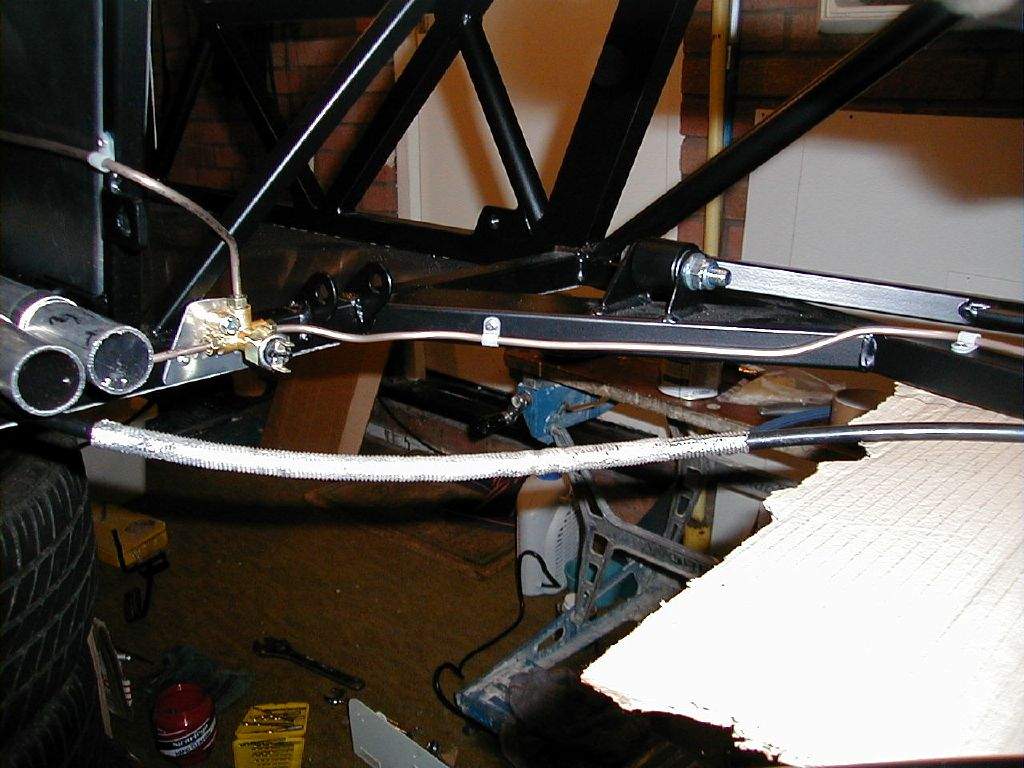
3rd November: 0h45m: Had a trial fit of the nose to see if I would be able to use the VW Polo radiator (as many Westfield owners use) that I had bought (on the understanding that I could return it if I couldn't make it fit!). Looks as though it should be possible. Update: The Polo radiator was later returned as I decided it was just too tight a fit. A Maestro 1.3 radiator is very slightly smaller, and looks as though it will do the job- and slightly cheaper as well! Fitted the OSR brake caliper, and realised that I would have to make a very minor mod to the pad back plate to stop them rubbing on the centre section of the brake disk (remember these are Sierra calipers gripping a Fiesta disk, so not as Mr. Ford intended!). 4th November: 1h15m: Fitted the NSF brake caliper, disk & pads. Started work on the front brake lines- one run from the master cylinder to a T-piece on the top front chassis rail, and then 2 runs out to the flexible hoses on either side. 6th November: 0h30m: Worked for a little longer on the front brake lines. 7th November: 2h00m: Continued with the front brake line. This was quite fiddly as lots of bends were required in a fairly restricted area. Made up a small bracket from some scrap aluminium to support the T-piece.
Modified the rear brake pad back plates to clear the disks, and then completed fitting both rear brake calipers. 10th November: 1h45m: Started on the rear brake lines. This was another fiddly job, and required another small bracket to be made to support the T-piece. The T-piece also needs filing down slightly to ensure that the brake lines screw in far enough to create a tight joint.
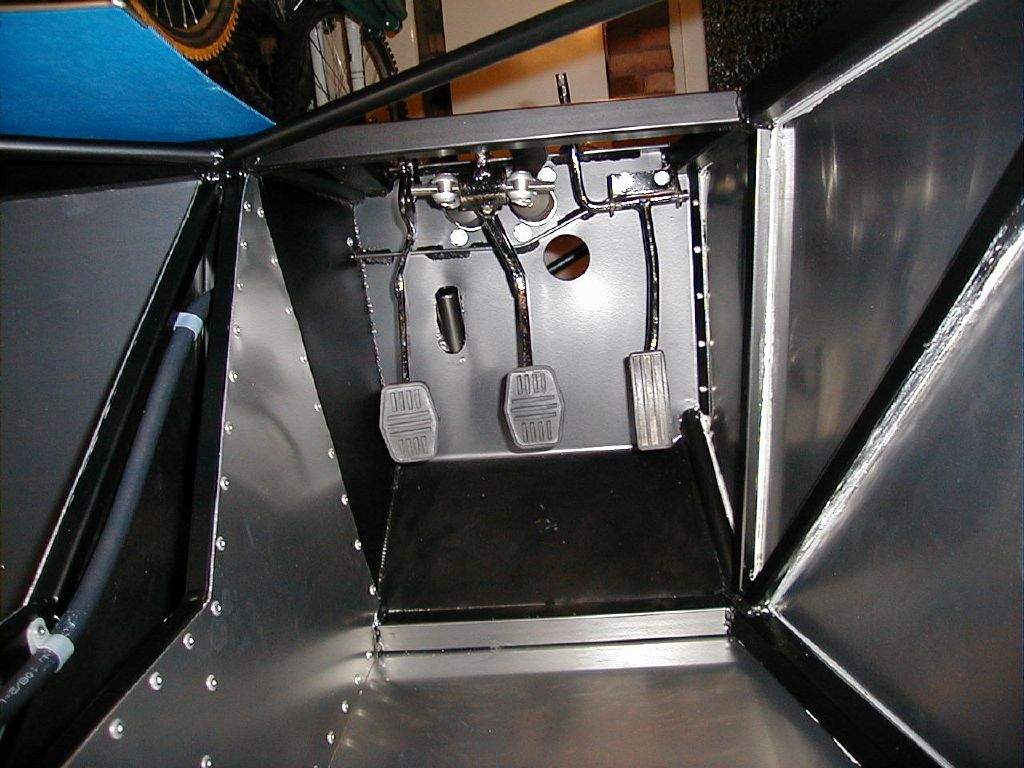
11th November: 1h00m: Painted the pedals. 12th November: 2h00m: Trial fitted the pedals to the pedal box to decide on the pedal spacing. I went out and measured the spacing on my Leon and Liz's Ka as a reference, knowing that I can heel and toe in the Ka, but not in the Leon. 2¼" seems to be the gap required between the brake and accelerator, so that's what I went for. The clutch pedal was spaced to centralise between the brake and the tunnel. With spacings decided, I made up three aluminium spacers from a short length of aluminium tube that came with the kit- these dictated the positions of the brake and clutch pedal. The throttle pedal is mounted on it's own pivot, which required the end plate of the footwell to be drilled to suit.
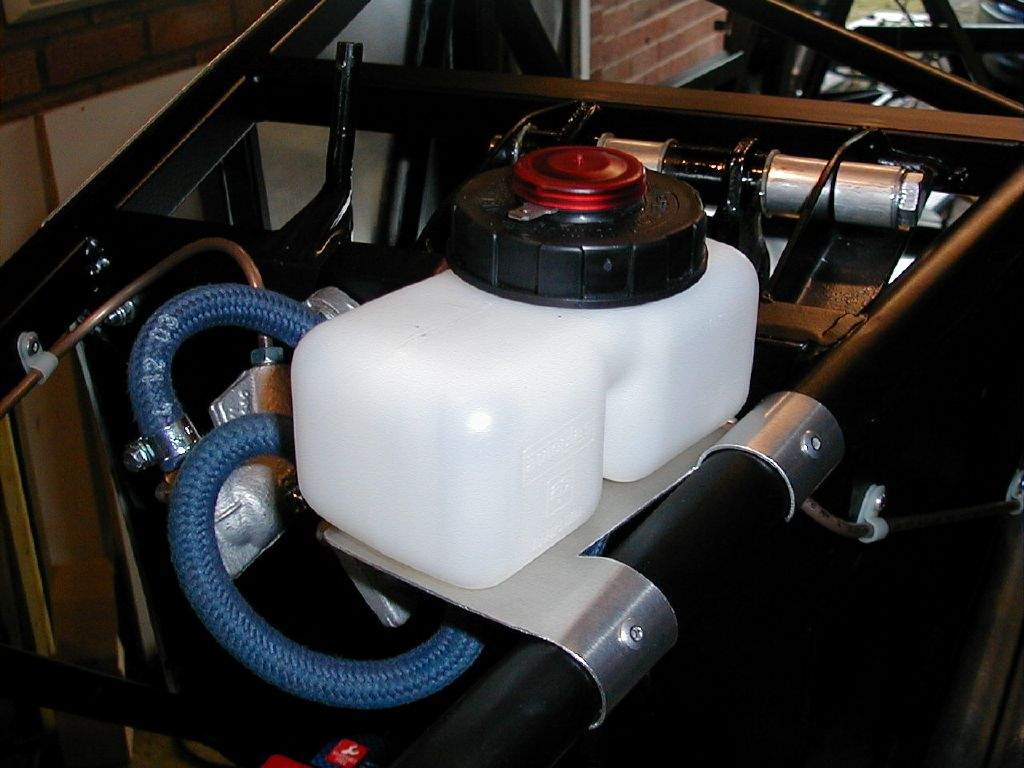
14th November: 0h30m: Began making a template for the brake fluid reservoir bracket. 15th November: 3h30m: Continued making the bracket for the brake fluid reservoir. This was a fiddly job but I'm pleased with the end result.
Moved on to fit the handbrake cables. Fitting the end of the cable to the lever on the caliper is a difficult job, they are not designed to come back off in a hurry (I remember that removing the cables from the original calipers in the scrap yard required a lot of brute force!). Zip tied the cables to the lower wishbone and fed around to the rear of the tunnel. As instructed in the manual, I didn't connect to the handbrake as yet- the brake system needs filling and bleeding first. Removed the two radiator pipes from the tunnel to form the required bends- again, lots of brute force required! 17th Nov: 1h00m: Spent some time working out how to package my newly acquired heater matrix and blower (from a Fiat 126!) I don't want to mount to the front end of the tunnel (inside the cockpit) as I think this looks ugly, and I don't think I'll have room to mount it slung below the front scuttle without it hanging down into view. So, I'm looking at the possibility of locating it in front of the driver's footwell, and moving the battery to a central position slightly further forward in the nose. I wasn't too happy with the battery just in front of the footwell as the clutch cable gets in the way, so this seems to be a better solution. It will mean ducting the resulting hot air over the top of the pedal box, but I think it might just work. I'll need to fabricate a new housing for the matrix and blower, to suit the new location and orientation. 18th Nov: 1h15m: Made up a bracket for the throttle cable and throttle pedal top-stop from aluminium extrusion. 19th Nov: 1h00m: Package arrived from Sylva containing my sump, lower steering column and fuel tank. I was straight on the phone to Jeremy as unfortunately the sump had been modified incorrectly: the wrong corner had been removed! Jeremy couldn't believe his mistake, but a second sump will be on its way soon. Tried the fuel tank in place and trial fitted the steering column to make sure it all went together well (I'm paranoid after the sump 'issue'!). The lower column will need removing again for painting. 20th Nov: 2h00m: Trial fitted my second attempt at a radiator- this time from a Maestro 1.3 as suggested in the build manual. It is still going to be a fairly tight fit, but it's been done before, so should be OK. Came up with a pattern for the new heater housing, and began to cut out of 20G aluminium panel. I'm trying to make this out of a single section with multiple folds.... Not sure whether I'll be successful, but decided it was worth a try! 23rd Nov: 3h30m: Finished cutting out the heater housing, and then began making all the folds. This was hard work, but my calculations and measurements proved to be accurate enough- the heater matrix fitted well. I then cut out a hole in the housing to suit the blower unit, and then mounted this in place. It's all a tight fit in the front- but that was part of the challenge! 24th Nov: 3h00m: Fitted the heater unit in place- it is attached with 2 stainless bolts fed up through the floor panel into 2 rivnuts fitted to the heater housing.
Pulled out the radiator pipes from the tunnel again (I had deliberately not tightened up the fixings from the last time they were out!) to tweak the bends based around where the heater matrix feed and return pipes are located, then slid them back in. I had a couple of bits of rubber pipe that had been used on the Fiat 126 which had a few 90 degree bends, so I attacked these with a knife to suit the new installation. I'll then need 2 connector pieces onto the long runs of heater hose back to the engine. 25th Nov: 0h30m: Wire brushed the steering column lower link and then painted in Smoothrite to match the upper column. Update: The lower steering column link was later modified by Sylva to replace the lower rubber joint from the Sierra column with a Montego universal joint. This led to a big improvement in steering feel, and improved the self-centring action. This is now standard procedure with new Mojo kits. 26th Nov: 2h00m: Began attacking the ignition barrel and surround in advance of final fitting the steering column. I've decided to go for a dash mounted key, so removed the barrel and column lock with a combination of angle grinder, hacksaw and hammer! This seemed to take forever! I left in place the four mount holes for indicator stalks- although I don't plan to use the Sierra stalks, the mount holes will still come in useful. 27th Nov: 1h00m: My Birthday! Still managed to get an hour in the garage though... Tidied up the steering column surround in the aftermath of yesterday's angle grinding frenzy! An hour or so with the file and I had a fairly neat finish- always important on those components that will soon be covered up... Fitted new upper and lower bearing races to the column surround- they are cheap at your local Ford dealer (even more so when you get the employee discount like me!). 28th Nov: 0h30m: Fitted the steering column in place.
30th Nov: 2h30m: Decided it was time to fill the brake system with fluid. Front circuit was done with no dramas, but on starting the rear circuit fluid started to appear around the joint between the flexi hose and the caliper. Hmm, not good. After trying the obvious (tightening things up a little) and finding both sides continued to leak, I decided to call it a day... Total time spent during November: 40hrs
|
|||||||||||||||||||||||||||||||||||
|
|
|||||||||||||||||||||||||||||||||||||